Complete the first-time setup
Add the information that appears on customer estimates and tax invoices.
Open Settings
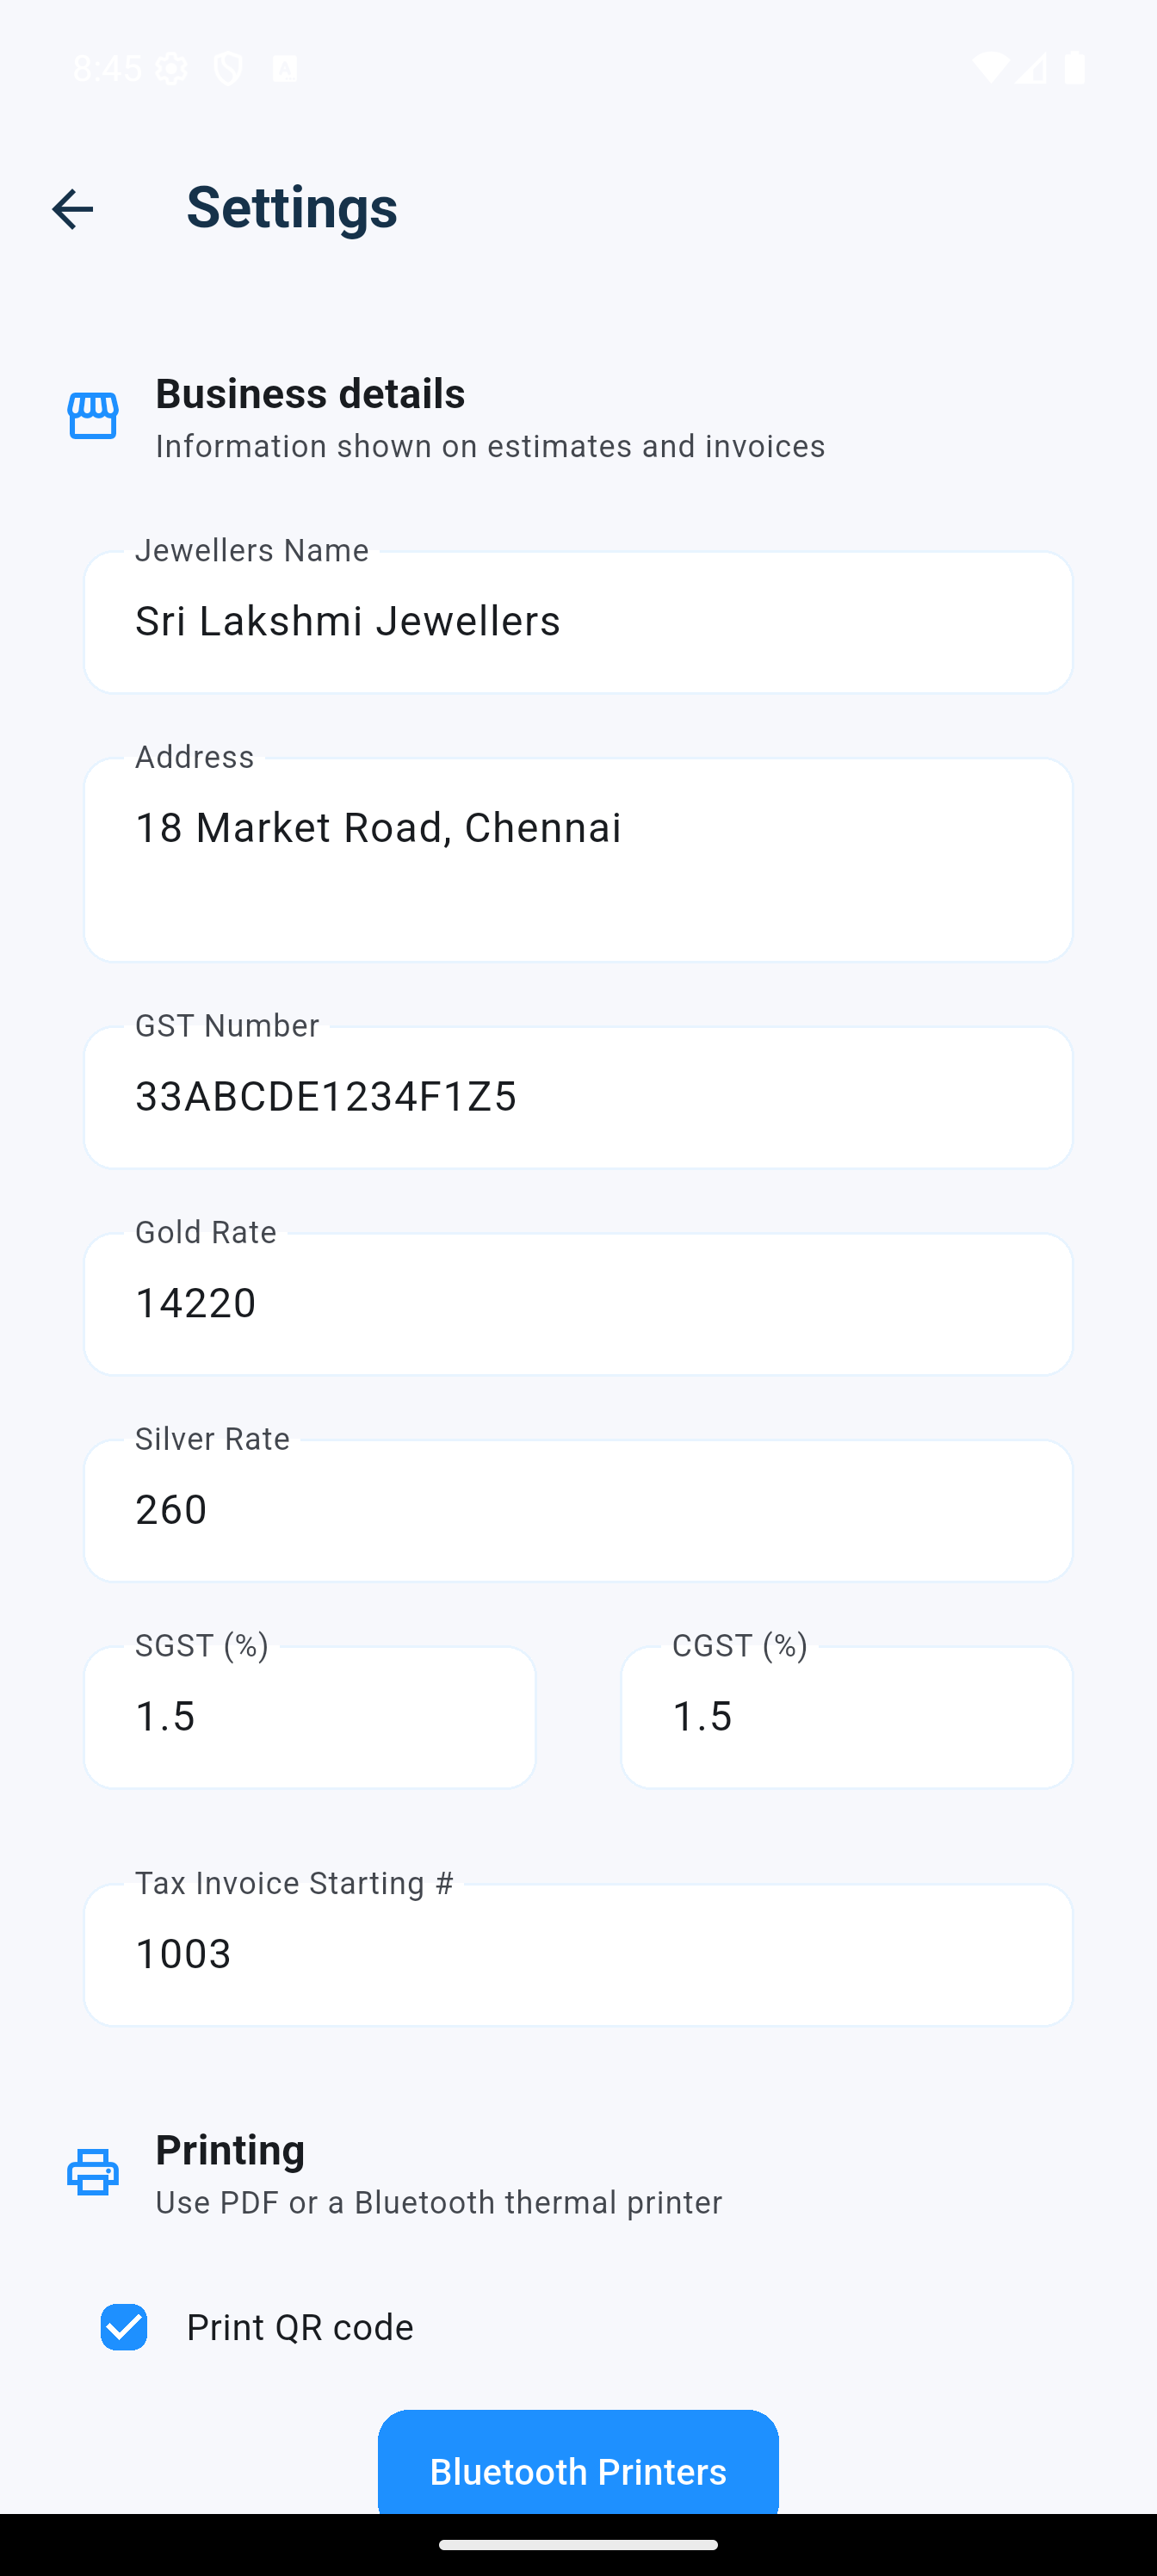
- Open the menu in the top-left, find the APP section and select Settings.
- Enter the jeweller name, address and GST number.
- Confirm the daily metal rates. New installations start with gold ₹14,220/g and silver ₹260/g.
- Set SGST to 1.5% and CGST to 1.5%.
- Set the next tax invoice number, then save.
Choose a print mode
Select PDF/system print for printable PDFs, or pair a supported Bluetooth thermal printer. Enable Print QR code when customers should receive a separate QR slip for later conversion to an invoice.
Build a jewellery estimate
Add one or many sale items, record exchange purchases and review the running total.
Add selling items
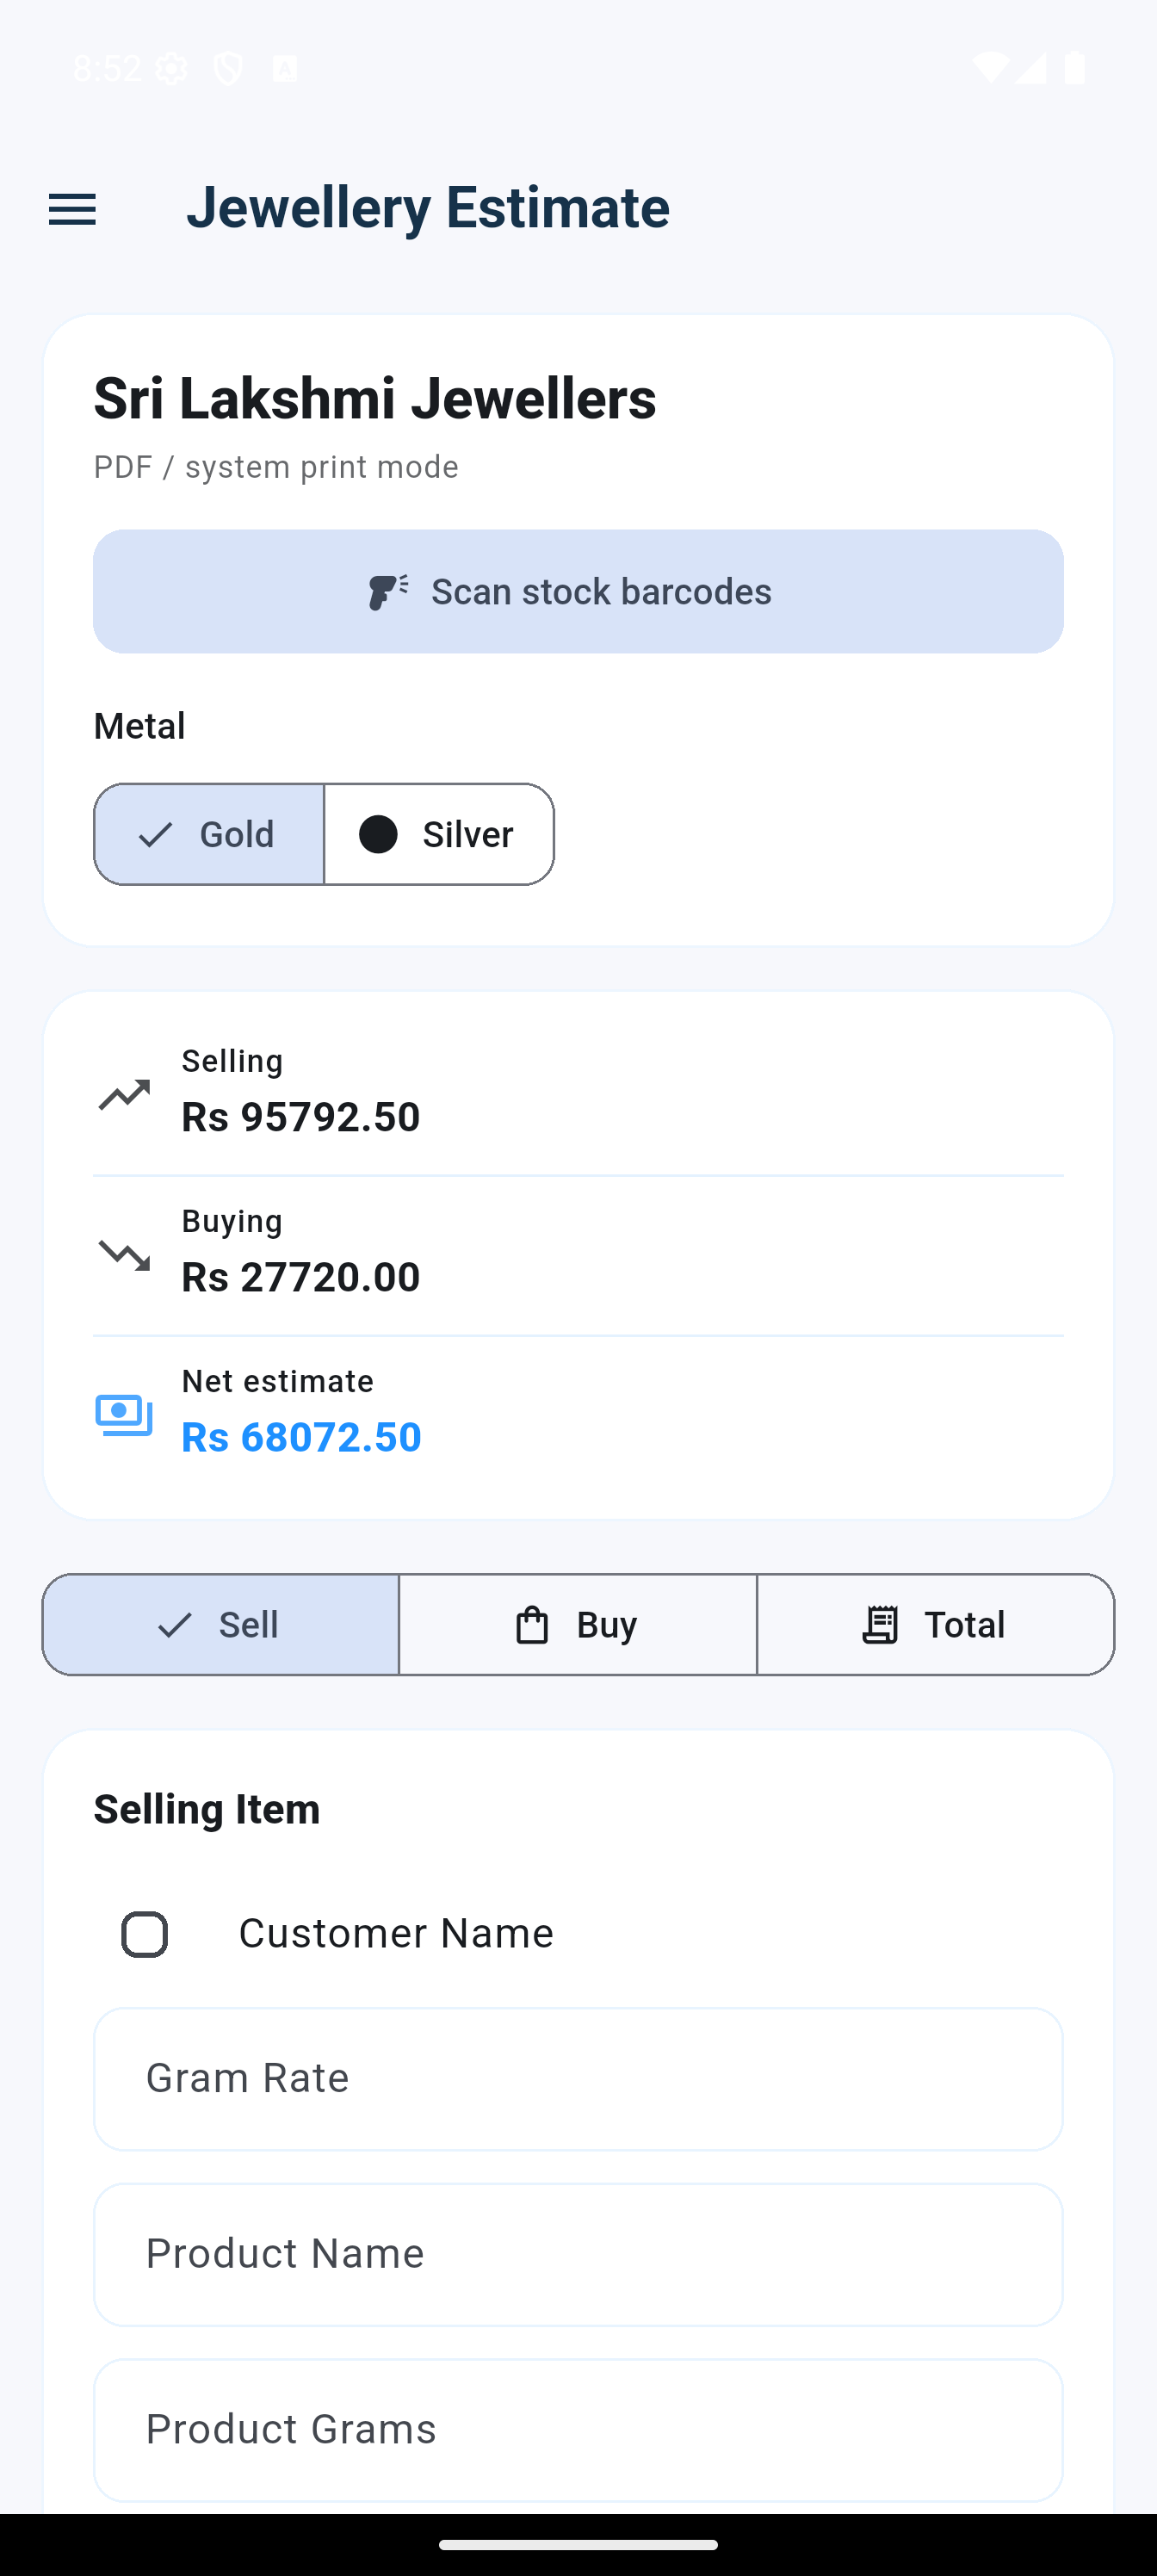
- Choose Gold or Silver at the top of the home screen.
- Open Sell. Enter the gram rate, product name and weight.
- Enter value addition and making charge. The form supports a flat making charge or a per-gram charge.
- Use the customer-name option when you want the item associated with a customer.
- Add the item and repeat for every product in the estimate.
Add exchange or purchase items
Open Buy, select the metal, then enter its weight and purchase rate. This amount is deducted from the selling total to calculate the net estimate.
Use Asking Price when you need to work backward from the customer’s target amount.
Scan several stock items into an estimate
The scanner on the main screen is the fastest route from HUID labels to a multi-item estimate.
- From the home screen, select Scan stock barcodes.
- Allow camera access if the device requests it.
- Place the barcode inside the scan area. The matching stock item is added to the current estimate.
- Continue scanning until all items are present, then close the scanner.
- Review every scanned item in Total. The current gold or silver rate is applied when the estimate is created.
Review, save, share or print the estimate
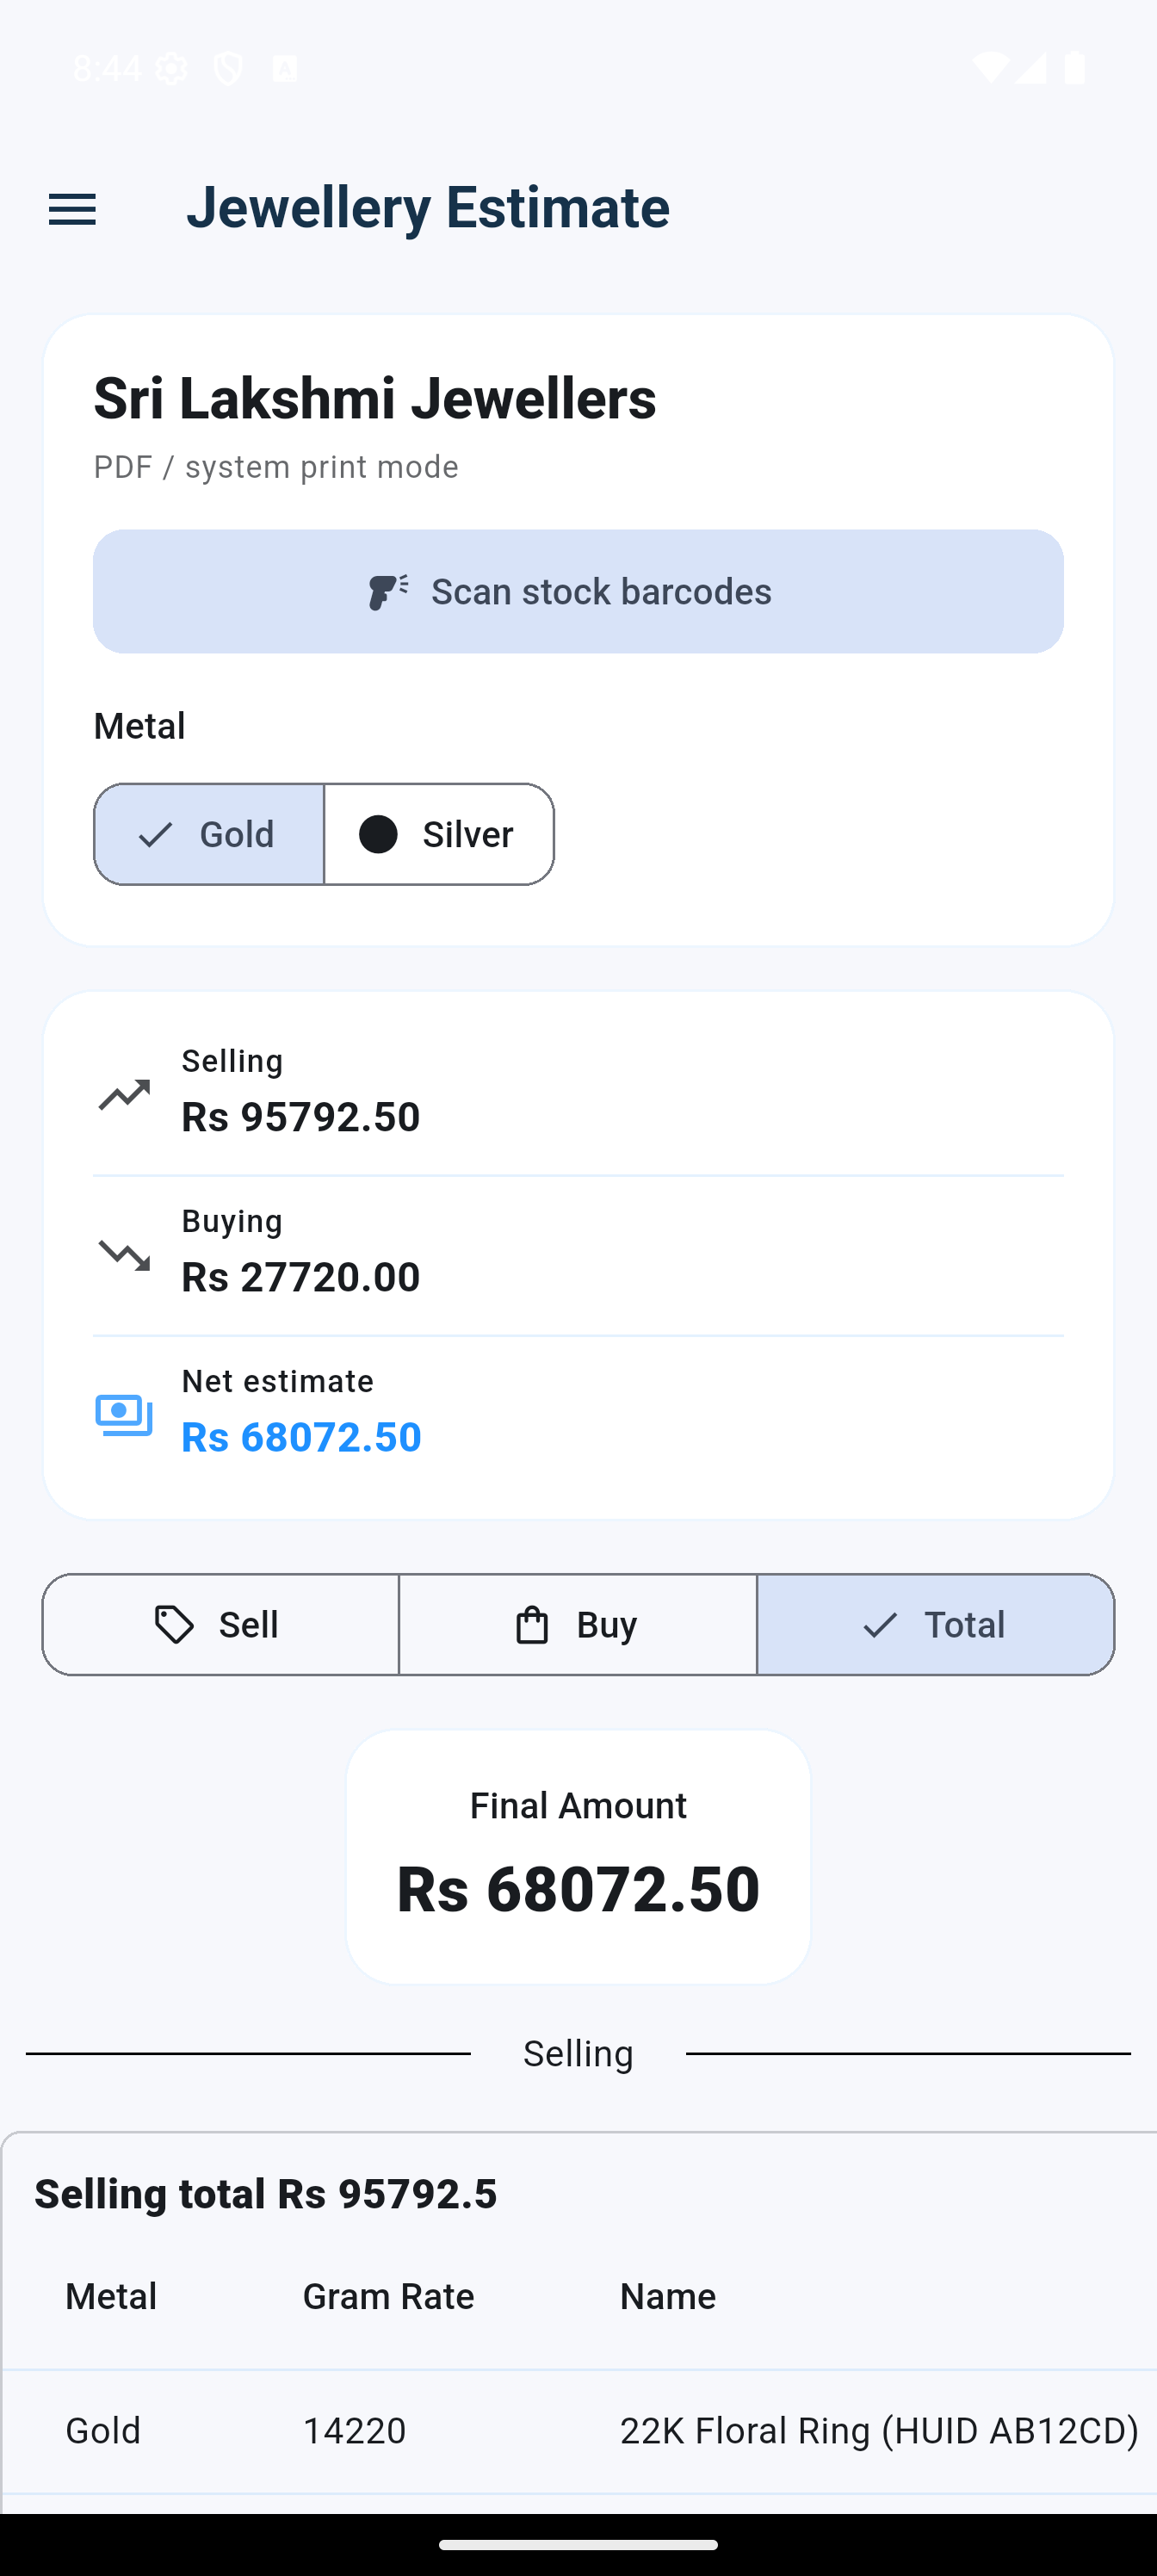
The Total view brings together sale items, exchange items and the final payable amount.
- Open Total and verify the selling total, buying total and net estimate.
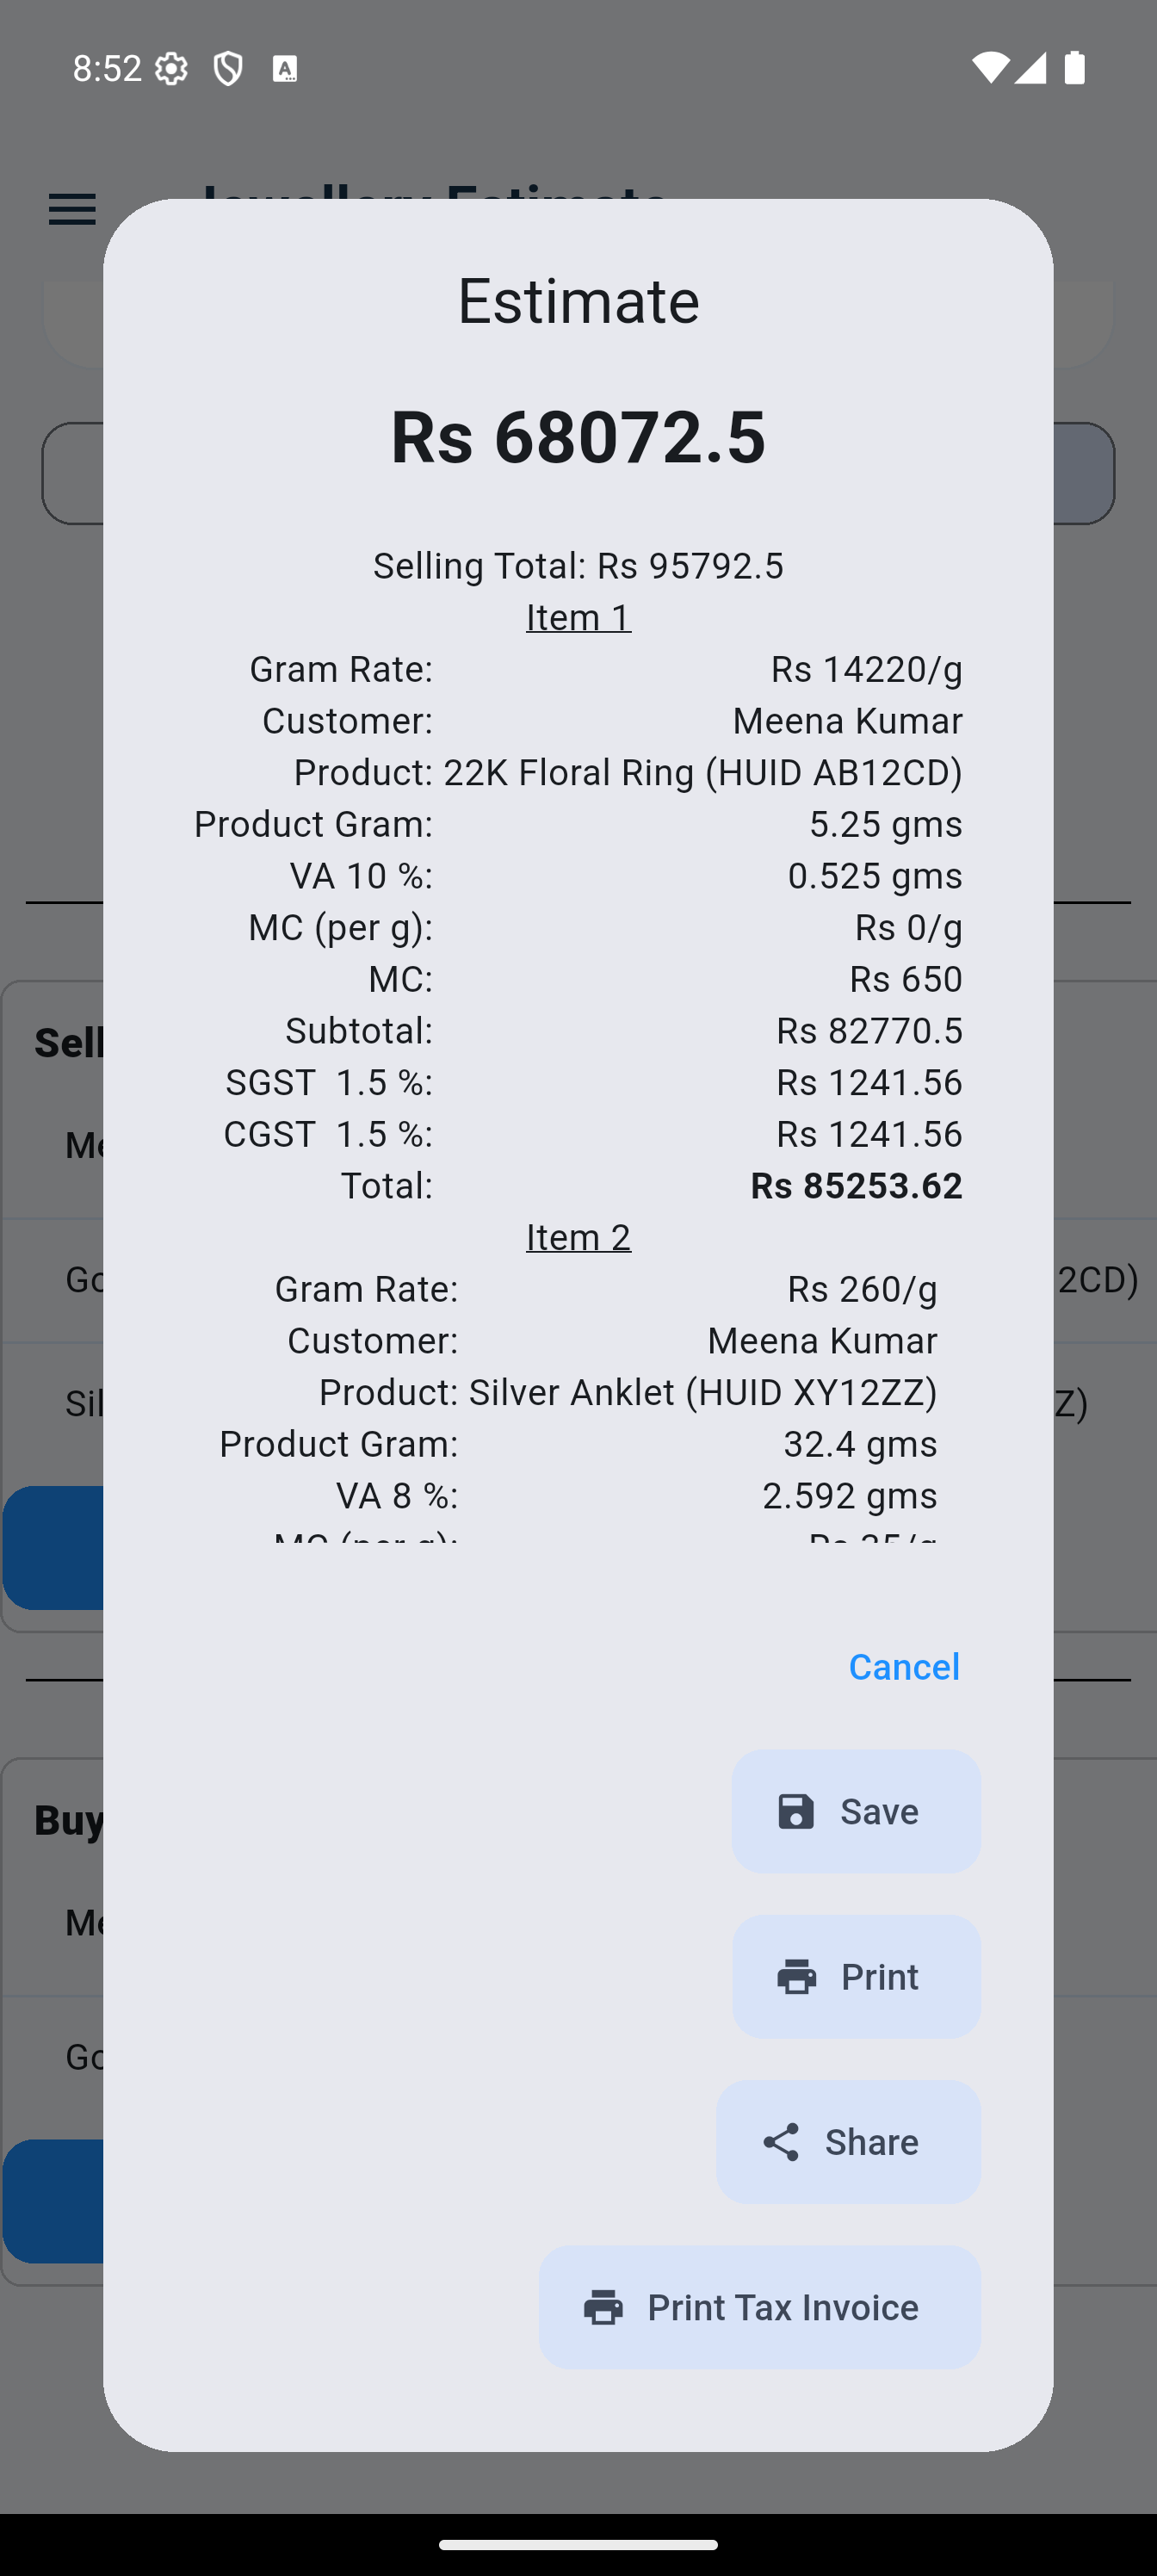
- Select Estimate to open the detailed review.
- Choose Save to store it in Estimate Logs, Share for a PDF, or Print for the selected printer.
- Select Print Tax Invoice to continue directly to customer details and invoicing.
Use the Estimate Log
Reopen saved work, produce a report or convert an estimate to an invoice without scanning its QR.
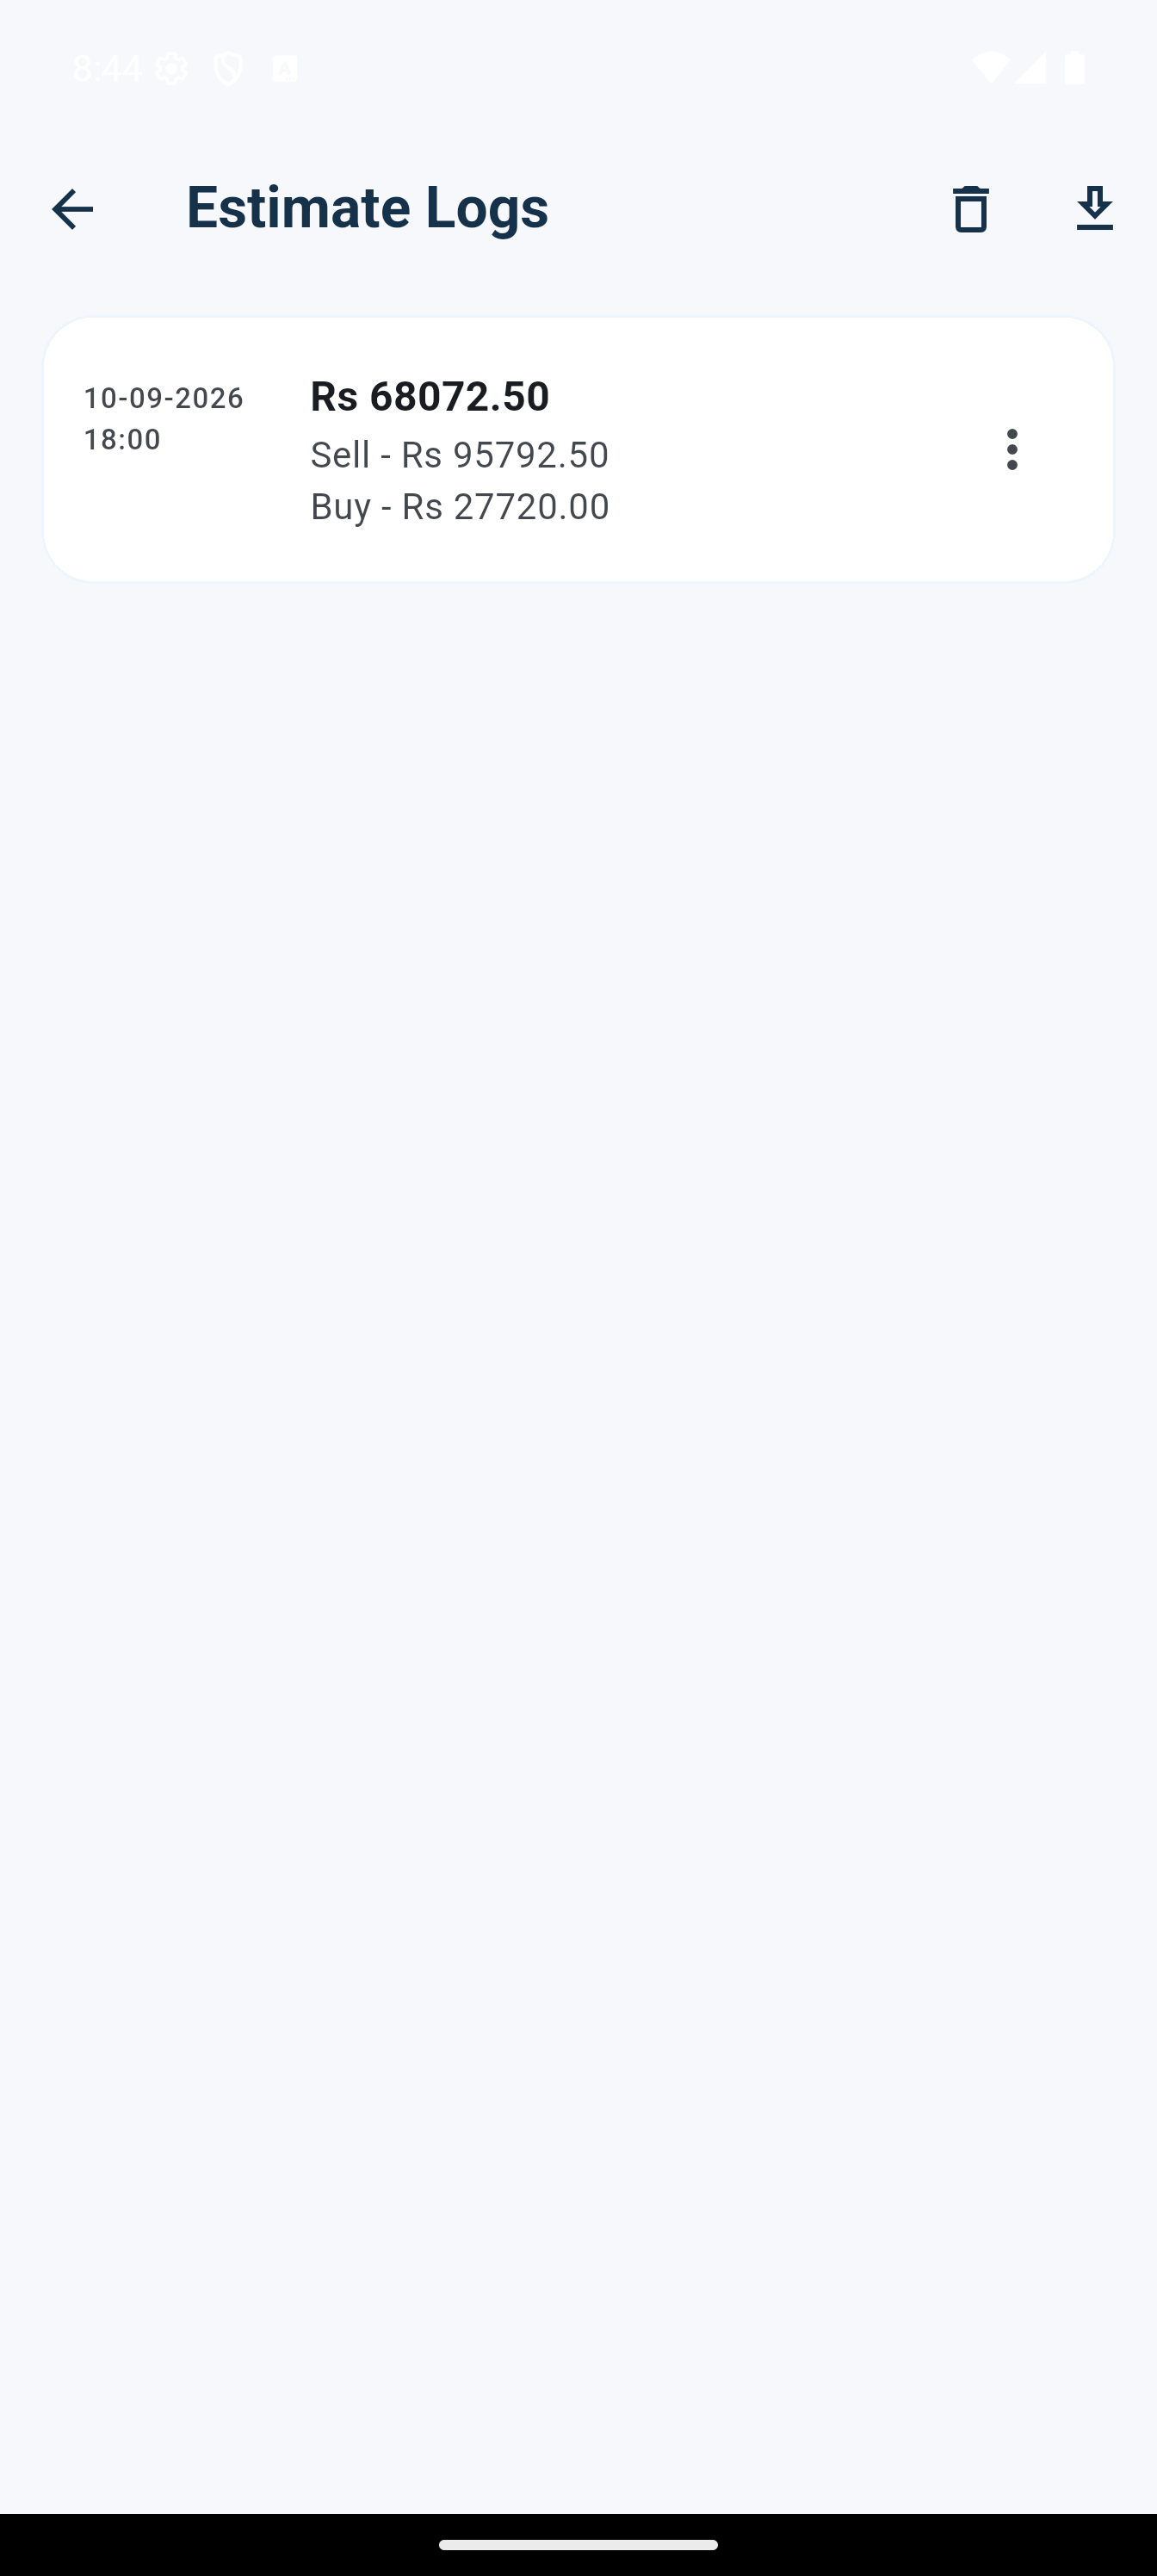
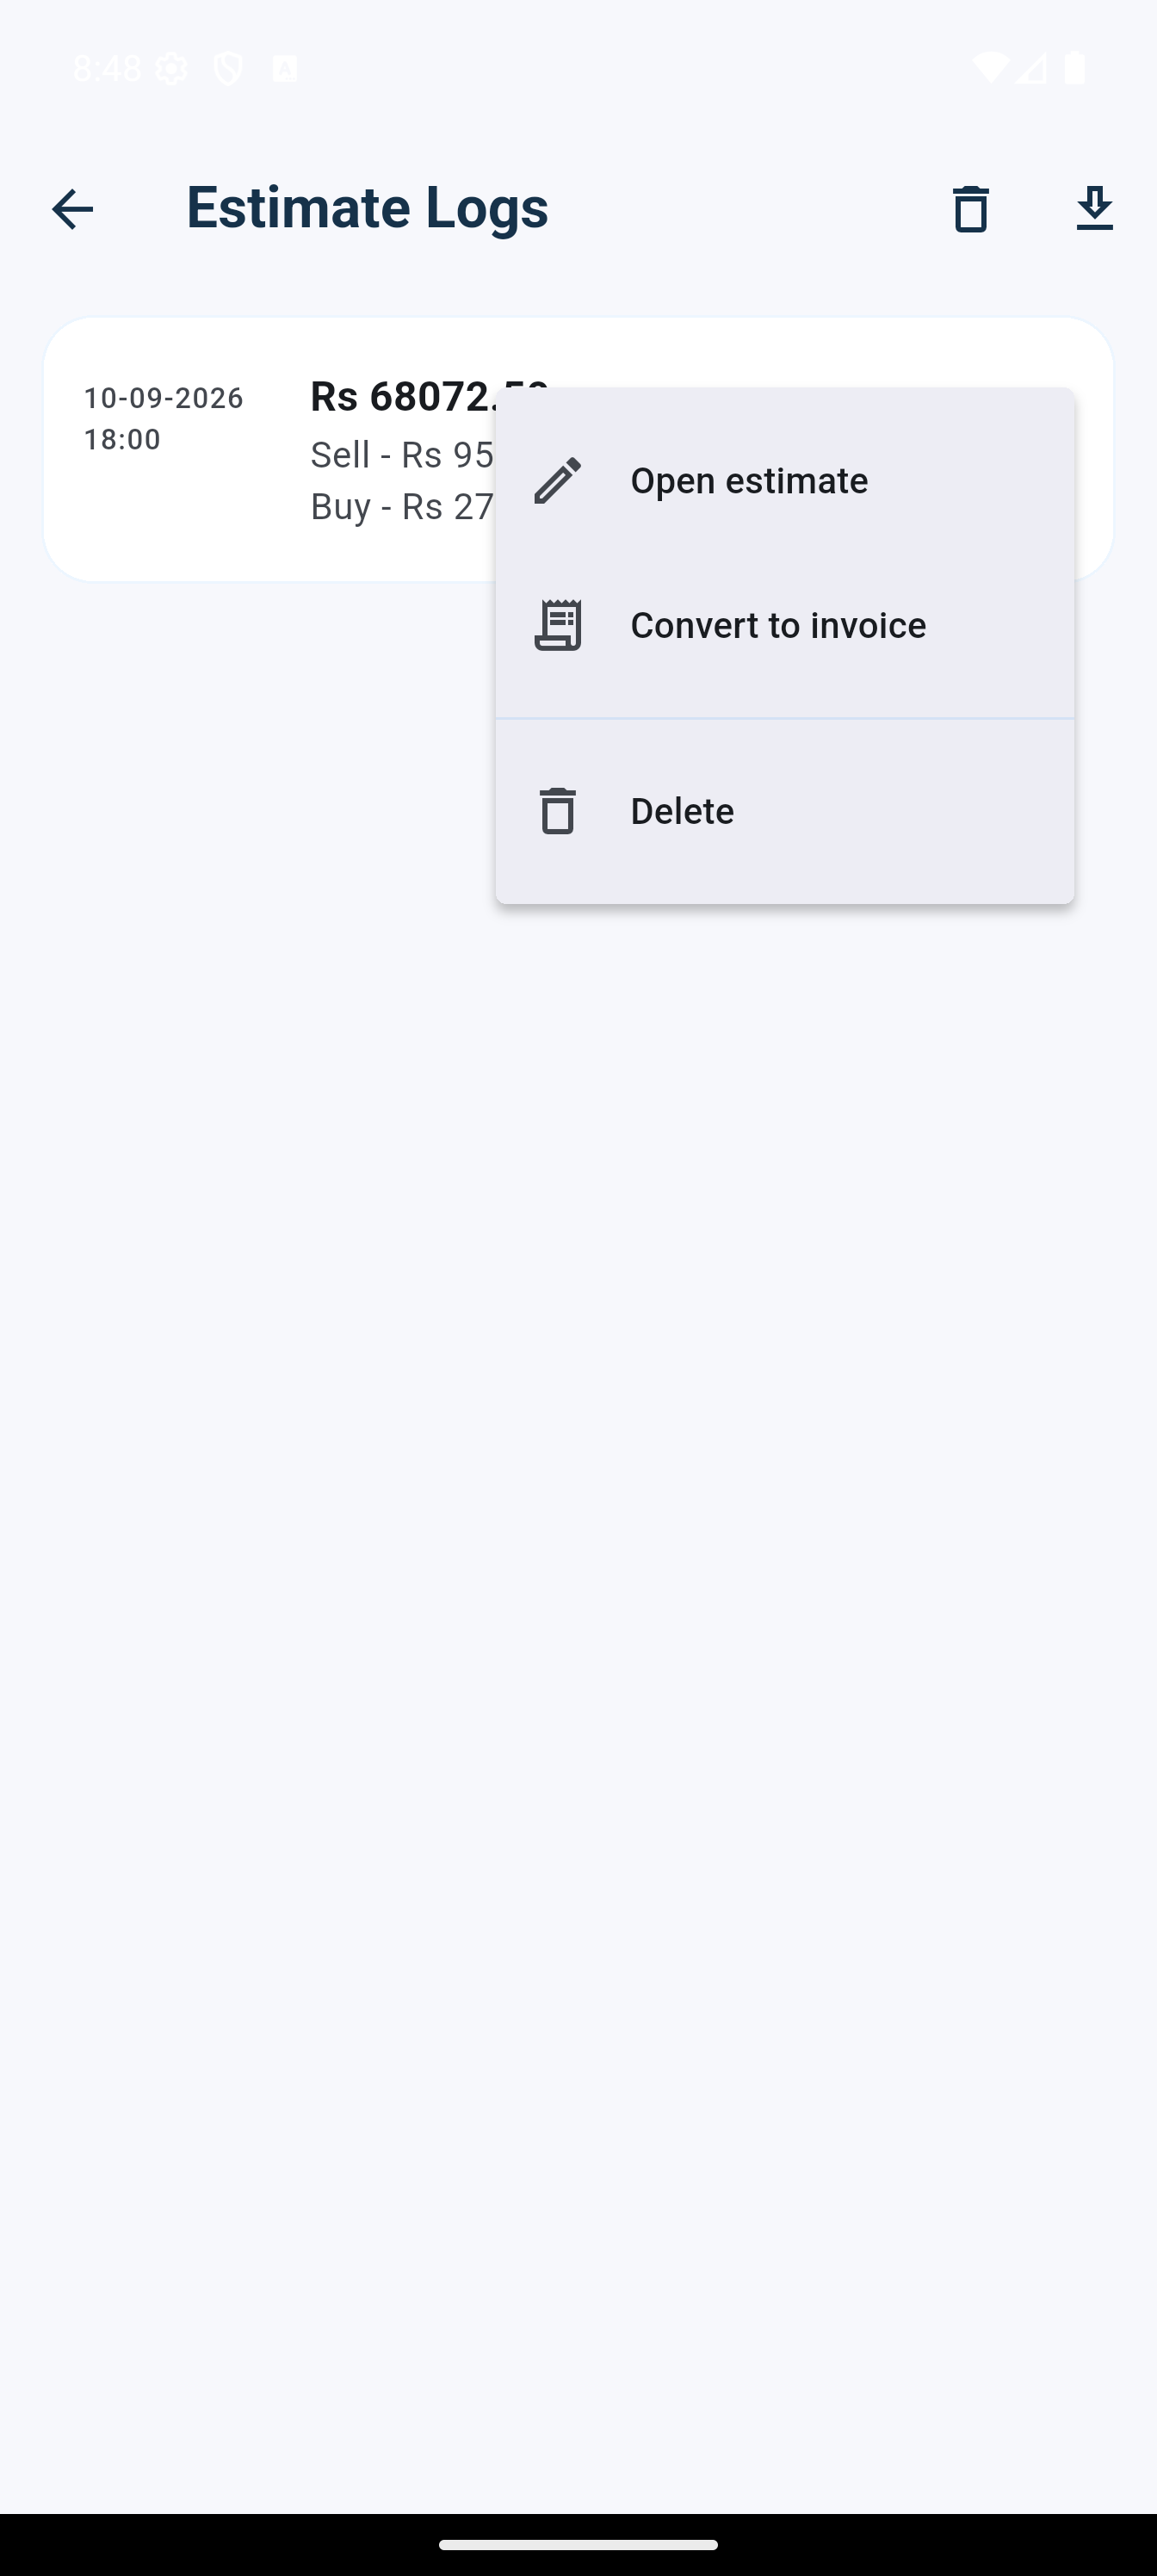
- Open estimate loads the selected record back into the estimator for review, printing or changes.
- Convert to invoice opens the tax-invoice customer form with the estimate items and totals already filled.
- Export report creates a PDF report of saved estimates.
- Delete removes only the selected estimate after confirmation.
Create a professional tax invoice
Convert the current estimate, a saved estimate or a scanned estimate into a customer invoice.
- Choose Print Tax Invoice from the estimate, Convert to invoice in Estimate Logs, or scan the estimate QR.
- Confirm the next invoice number and final amount.
- Enter the customer name, billing address and mobile number.
- Select Save and preview invoice, check the PDF, then print or share it.
What the invoice contains
The layout includes business and GST details, customer details, item descriptions, weights, current estimate-date rates, taxes and totals. Customer invoices intentionally omit HUID values, stock barcodes and VA/making-charge column headings for a cleaner document.
Generated PDFs identify Jewellery Estimate Billing and include the Play Store download link.
Find and manage invoices
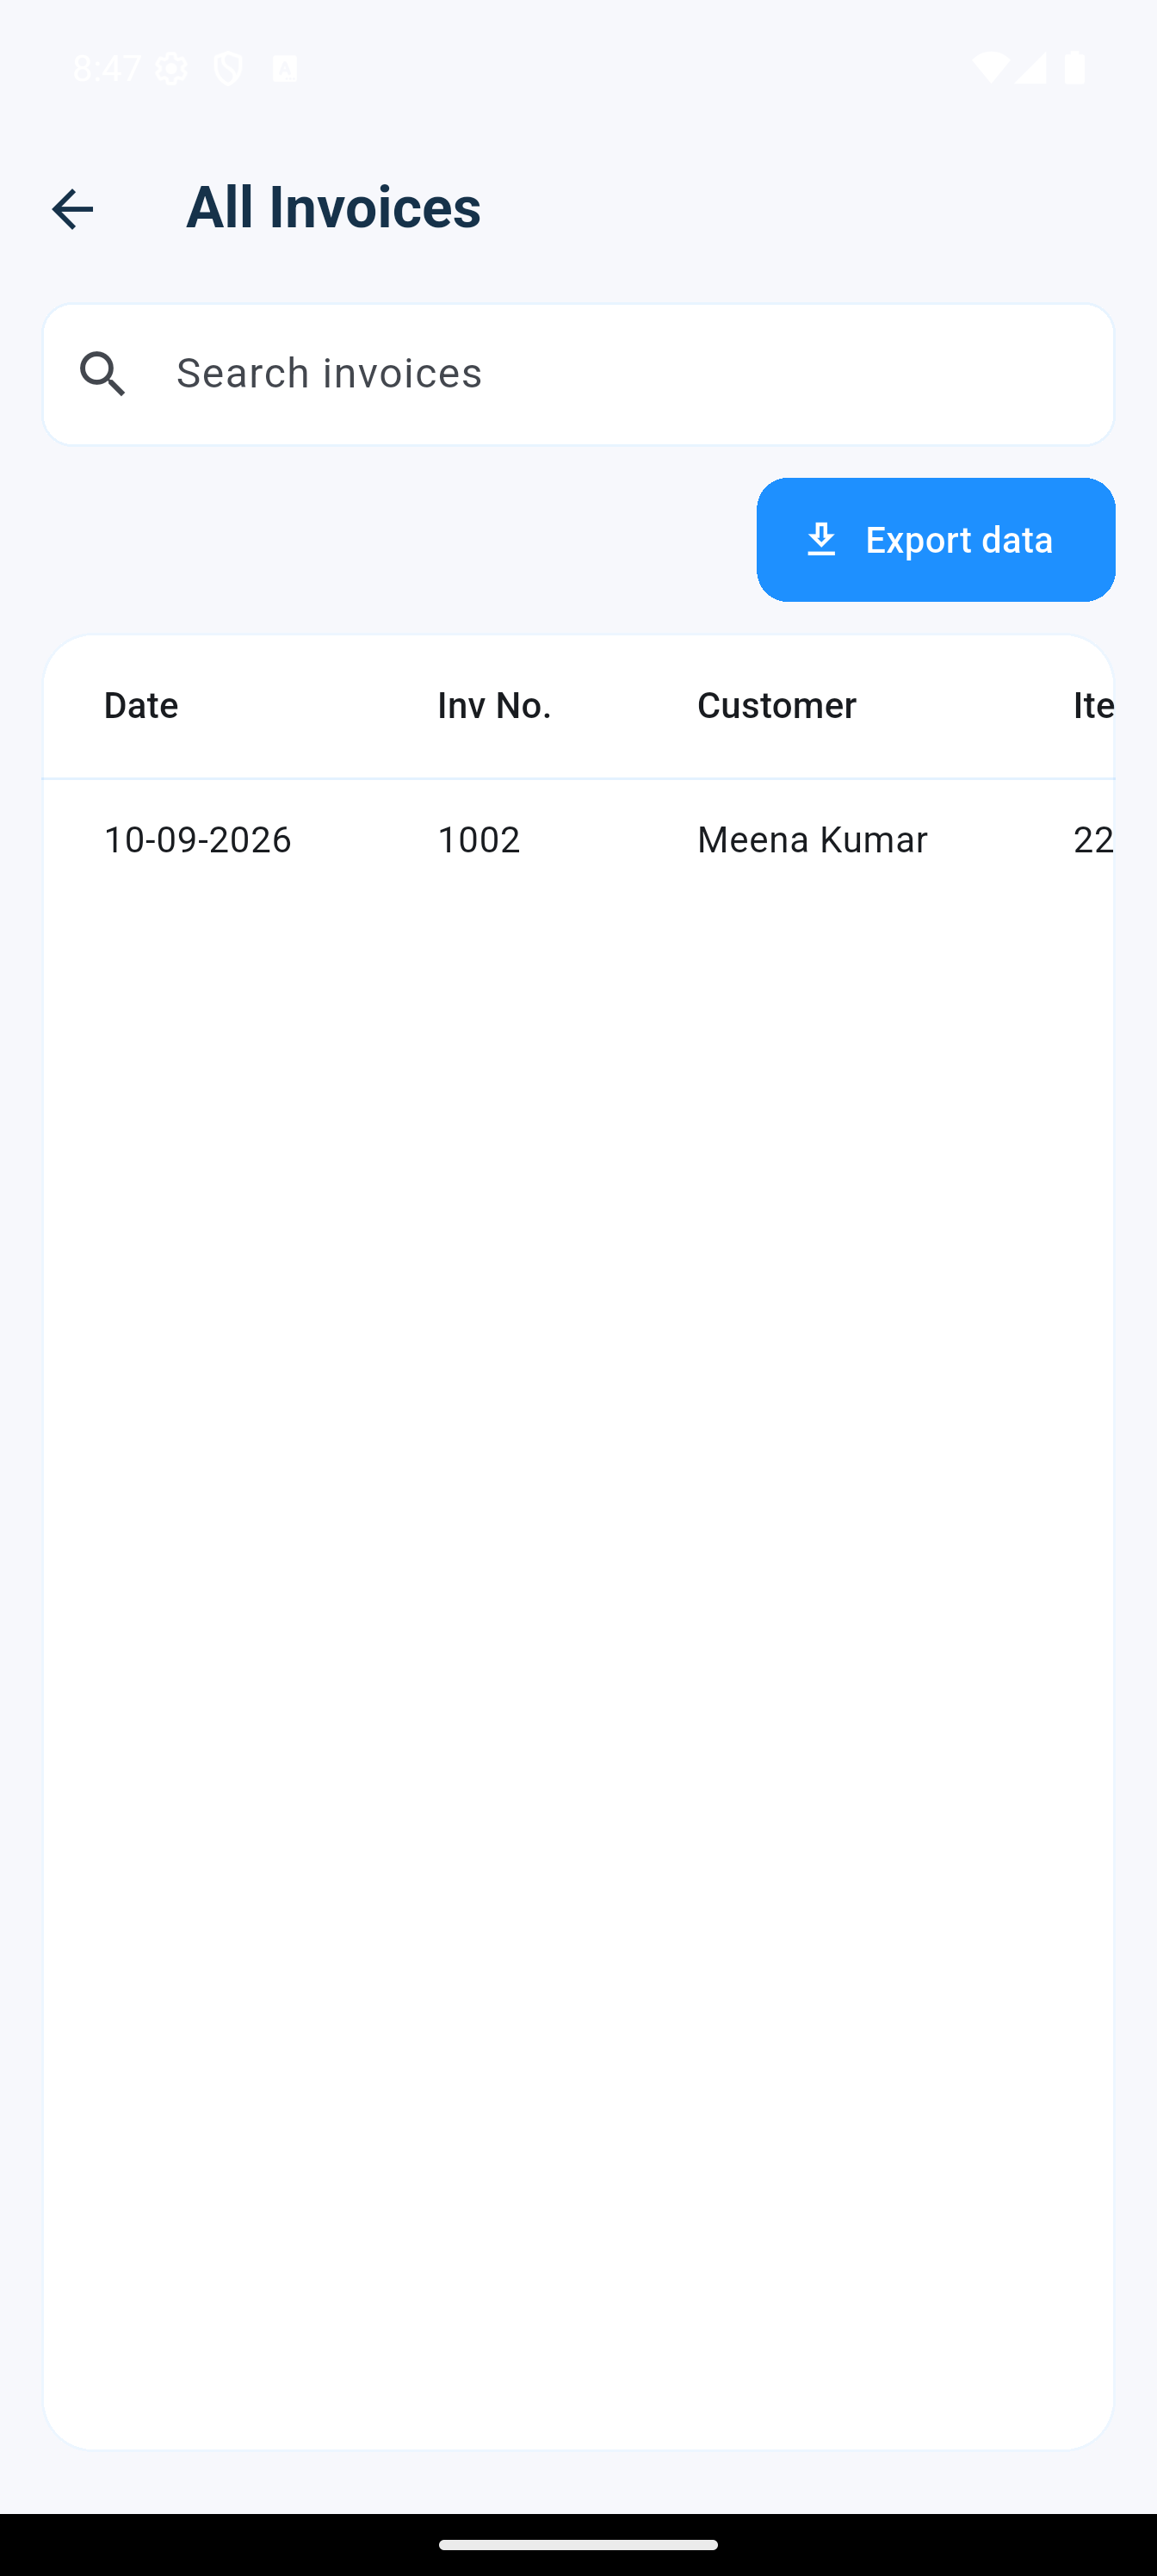
The All Invoices report is the central history for customer billing.
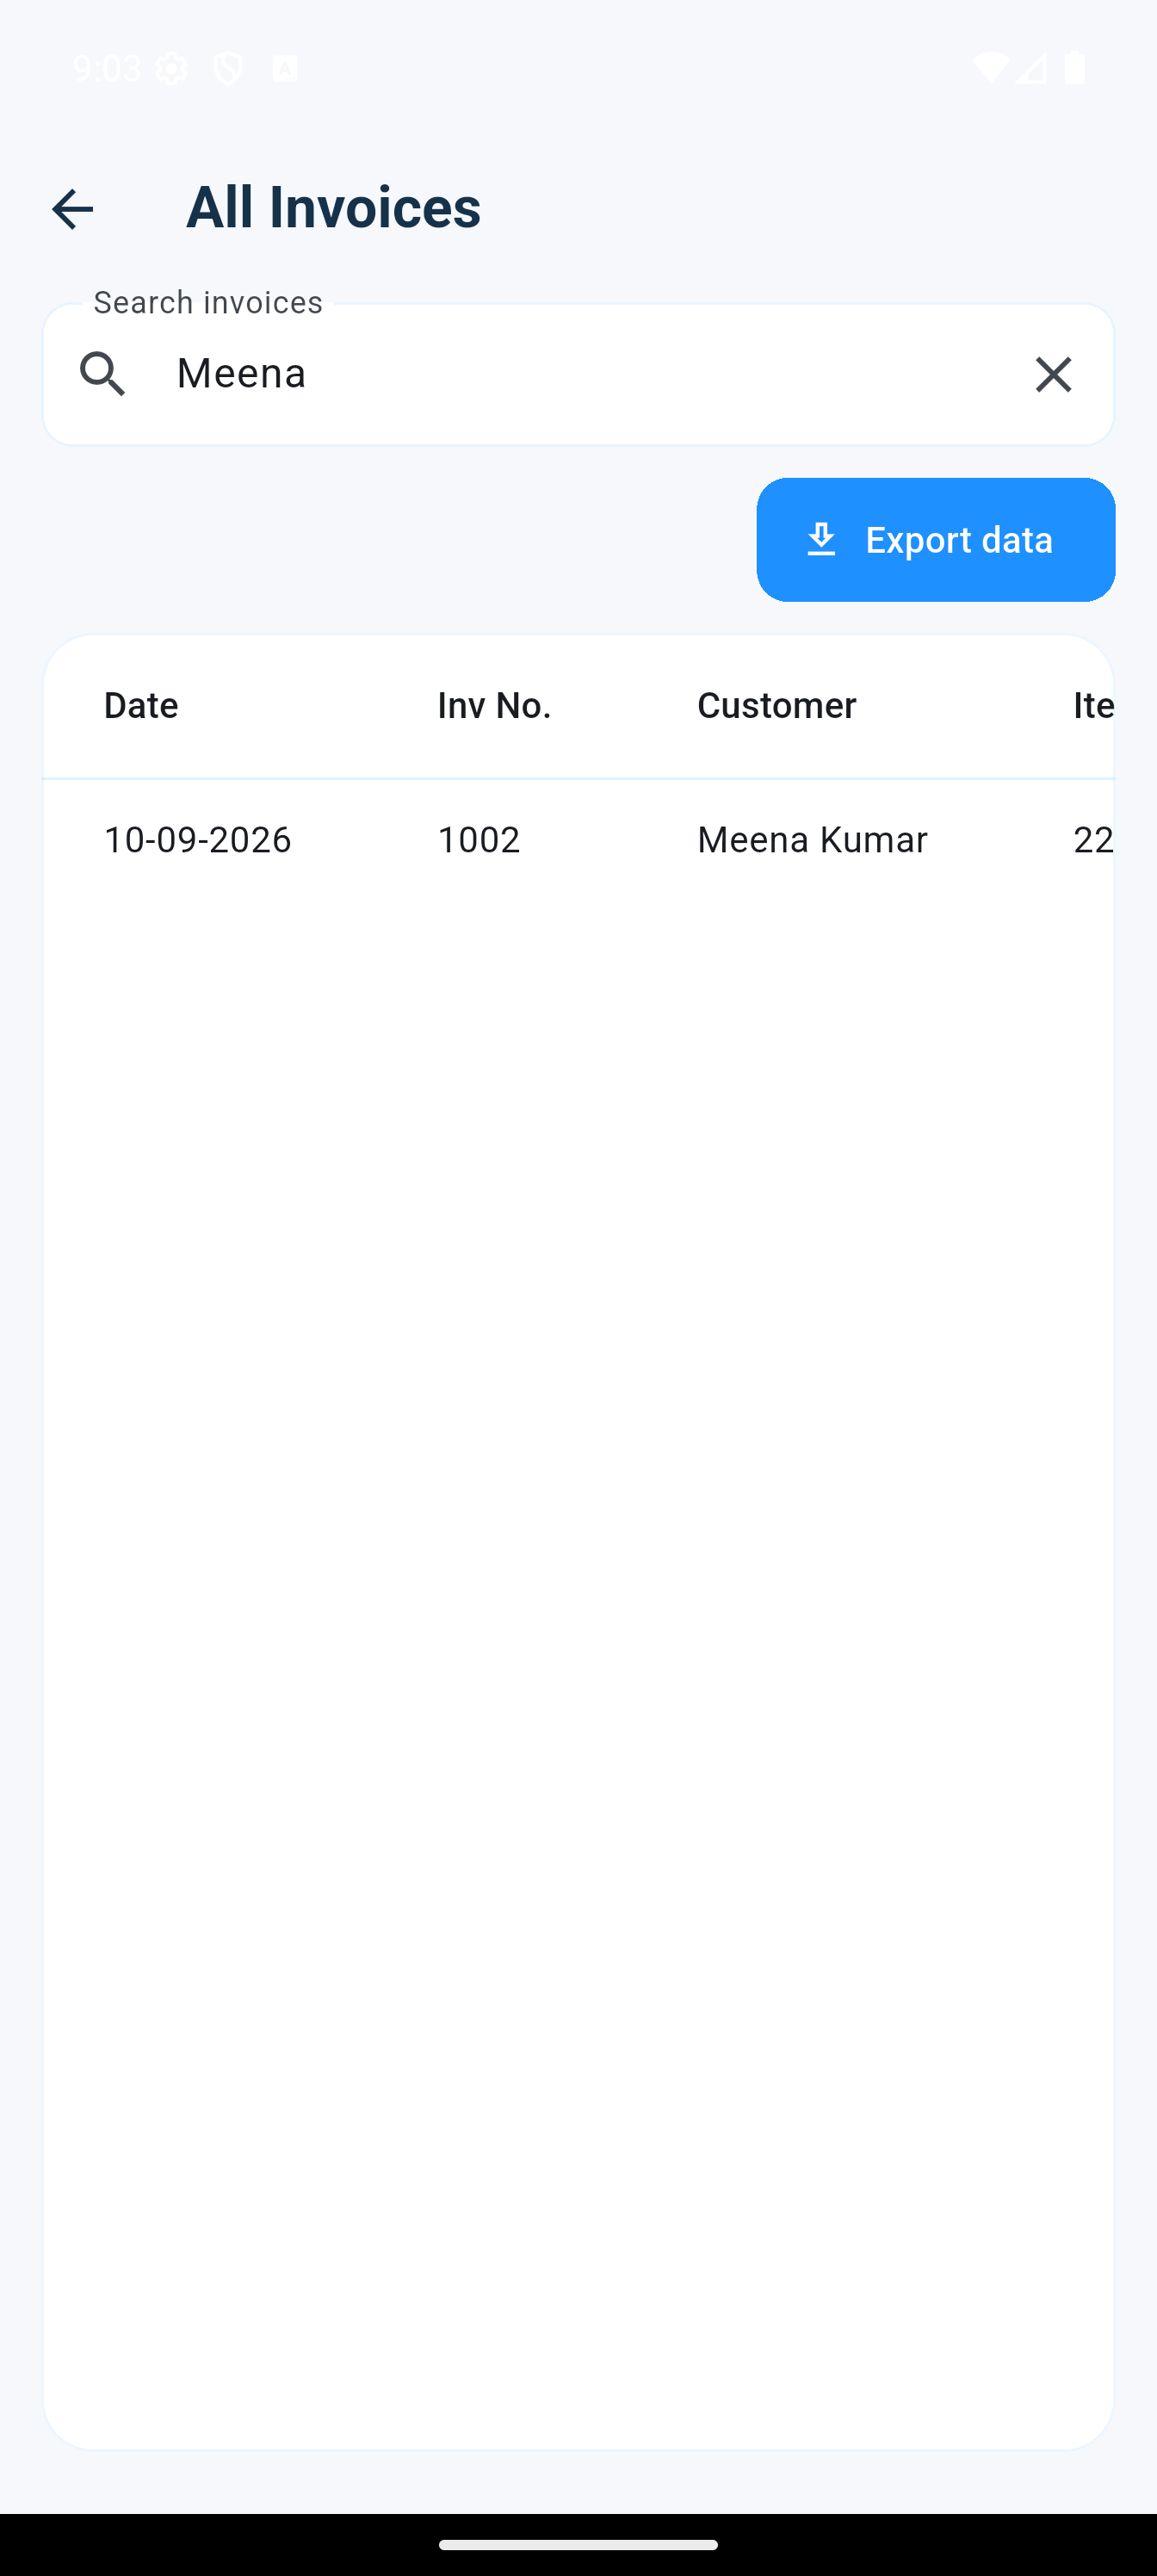
Search across invoice details
Type a customer name, invoice number, item name, HUID or stock barcode in Search invoices. Results filter immediately.
- Open a row to preview or reprint the invoice PDF.
- Use the row actions for supported invoice operations.
- Select Export data to create the invoice report spreadsheet.
- Use report dates and exported records for reconciliation and tax preparation.
Manage stock and HUID records
Stock is organised as Metal → Category → Design type, with quantity, weight and optional HUID identity.
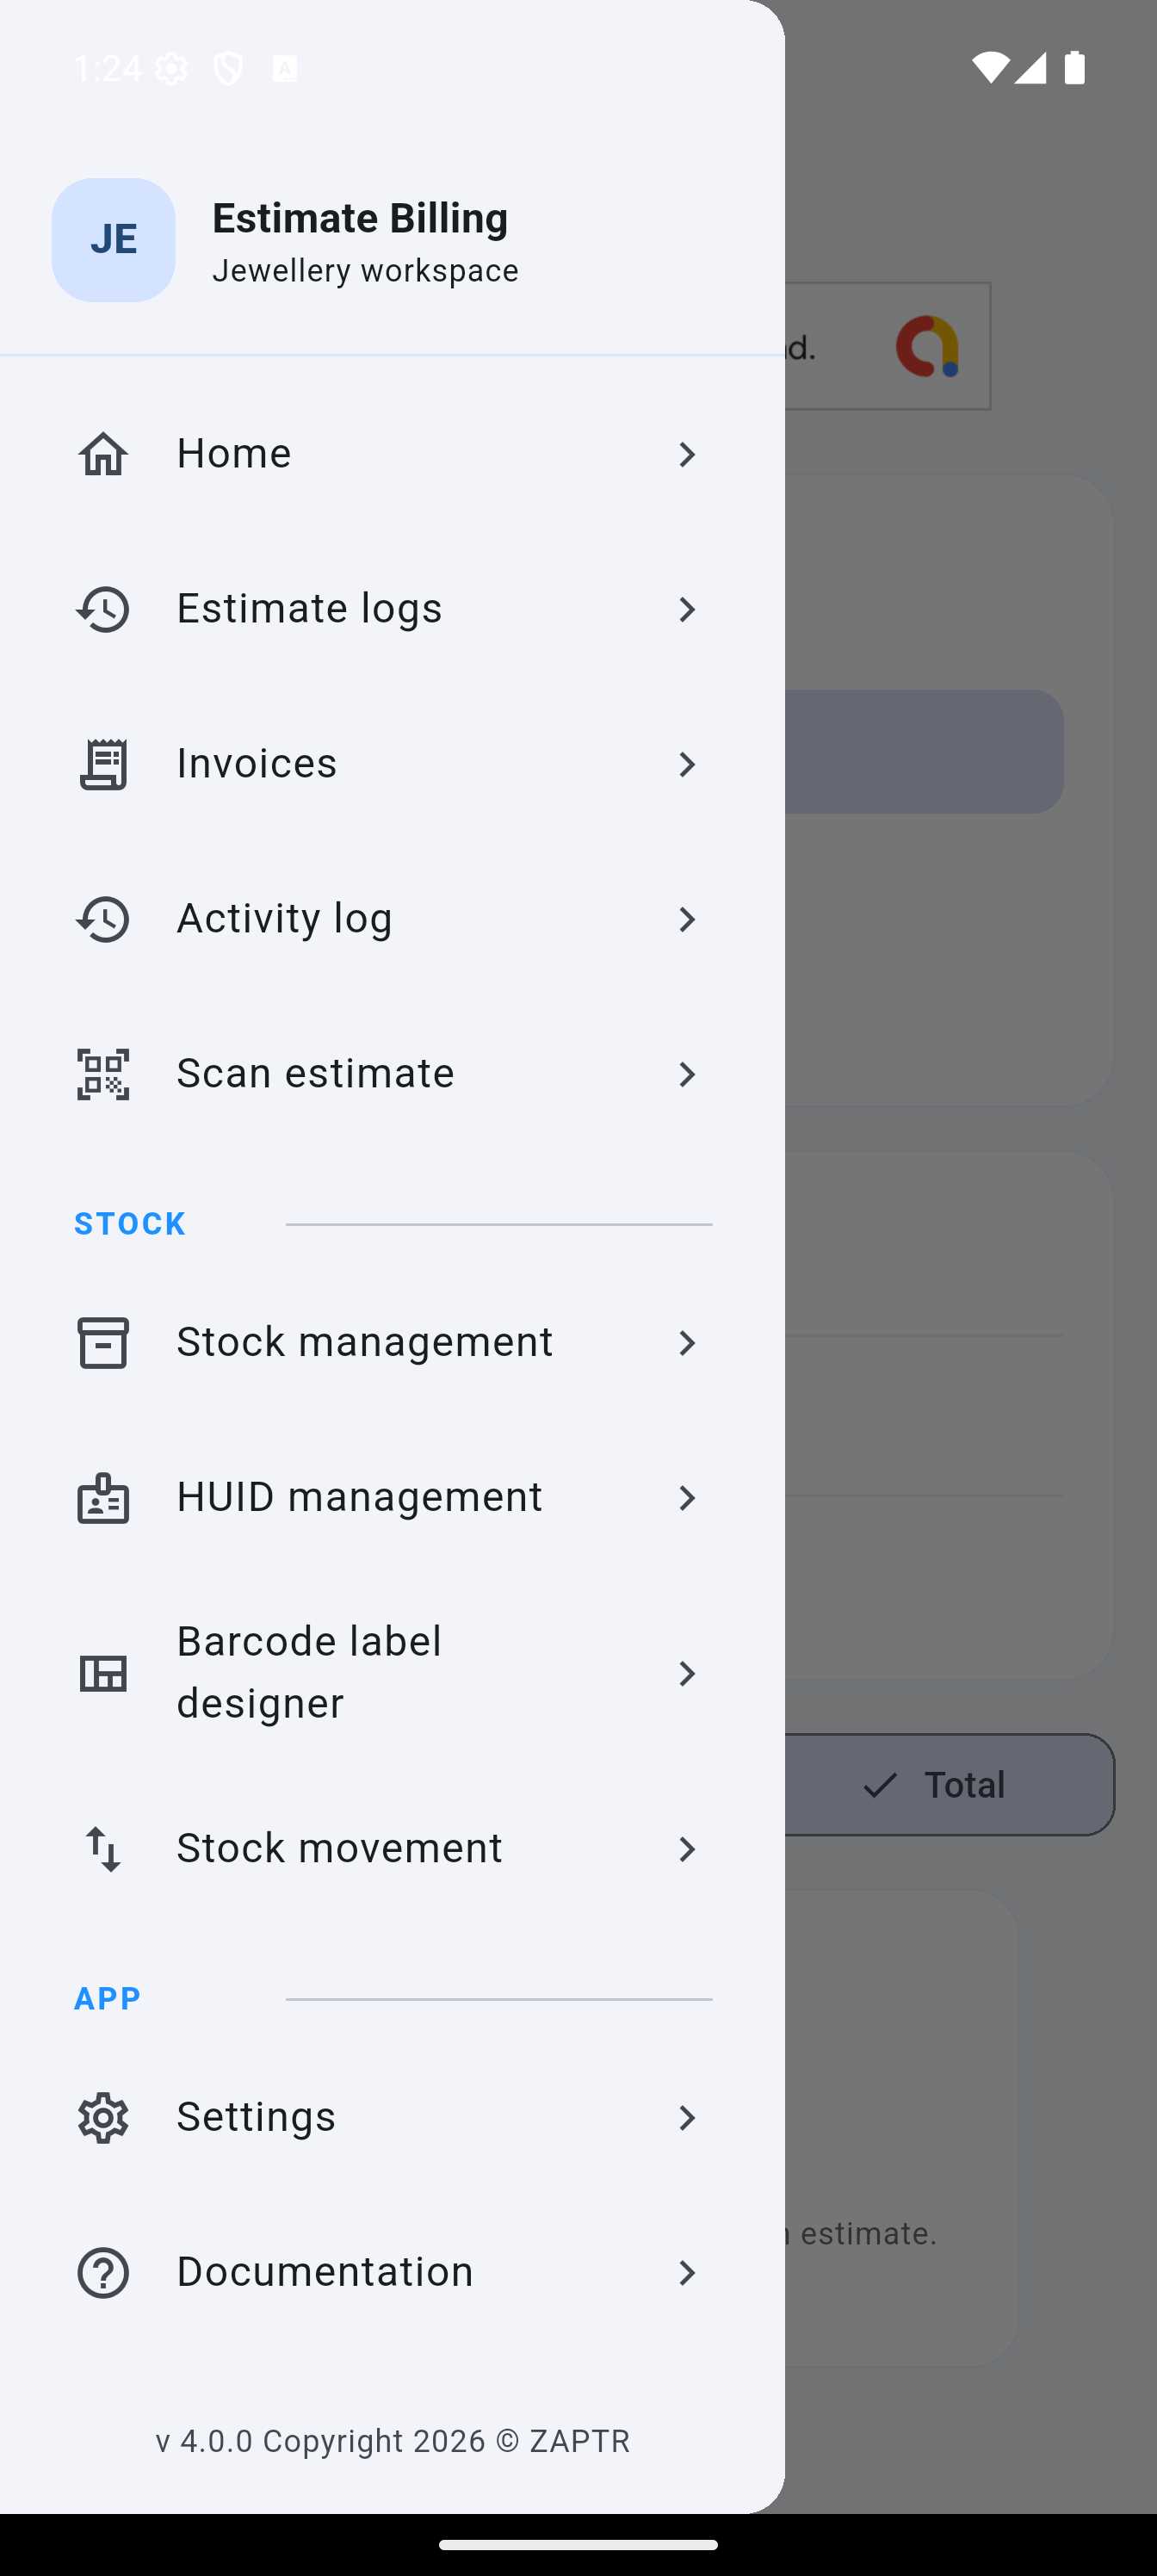
Find every stock tool together
Open the main menu and scroll to the STOCK section. The subscription-protected inventory tools are grouped in one place:
- Stock management adds, edits, imports and exports inventory.
- HUID management searches, filters, selects and batch-prints HUID products.
- Barcode label designer changes sticker size, placement and text or barcode sizing.
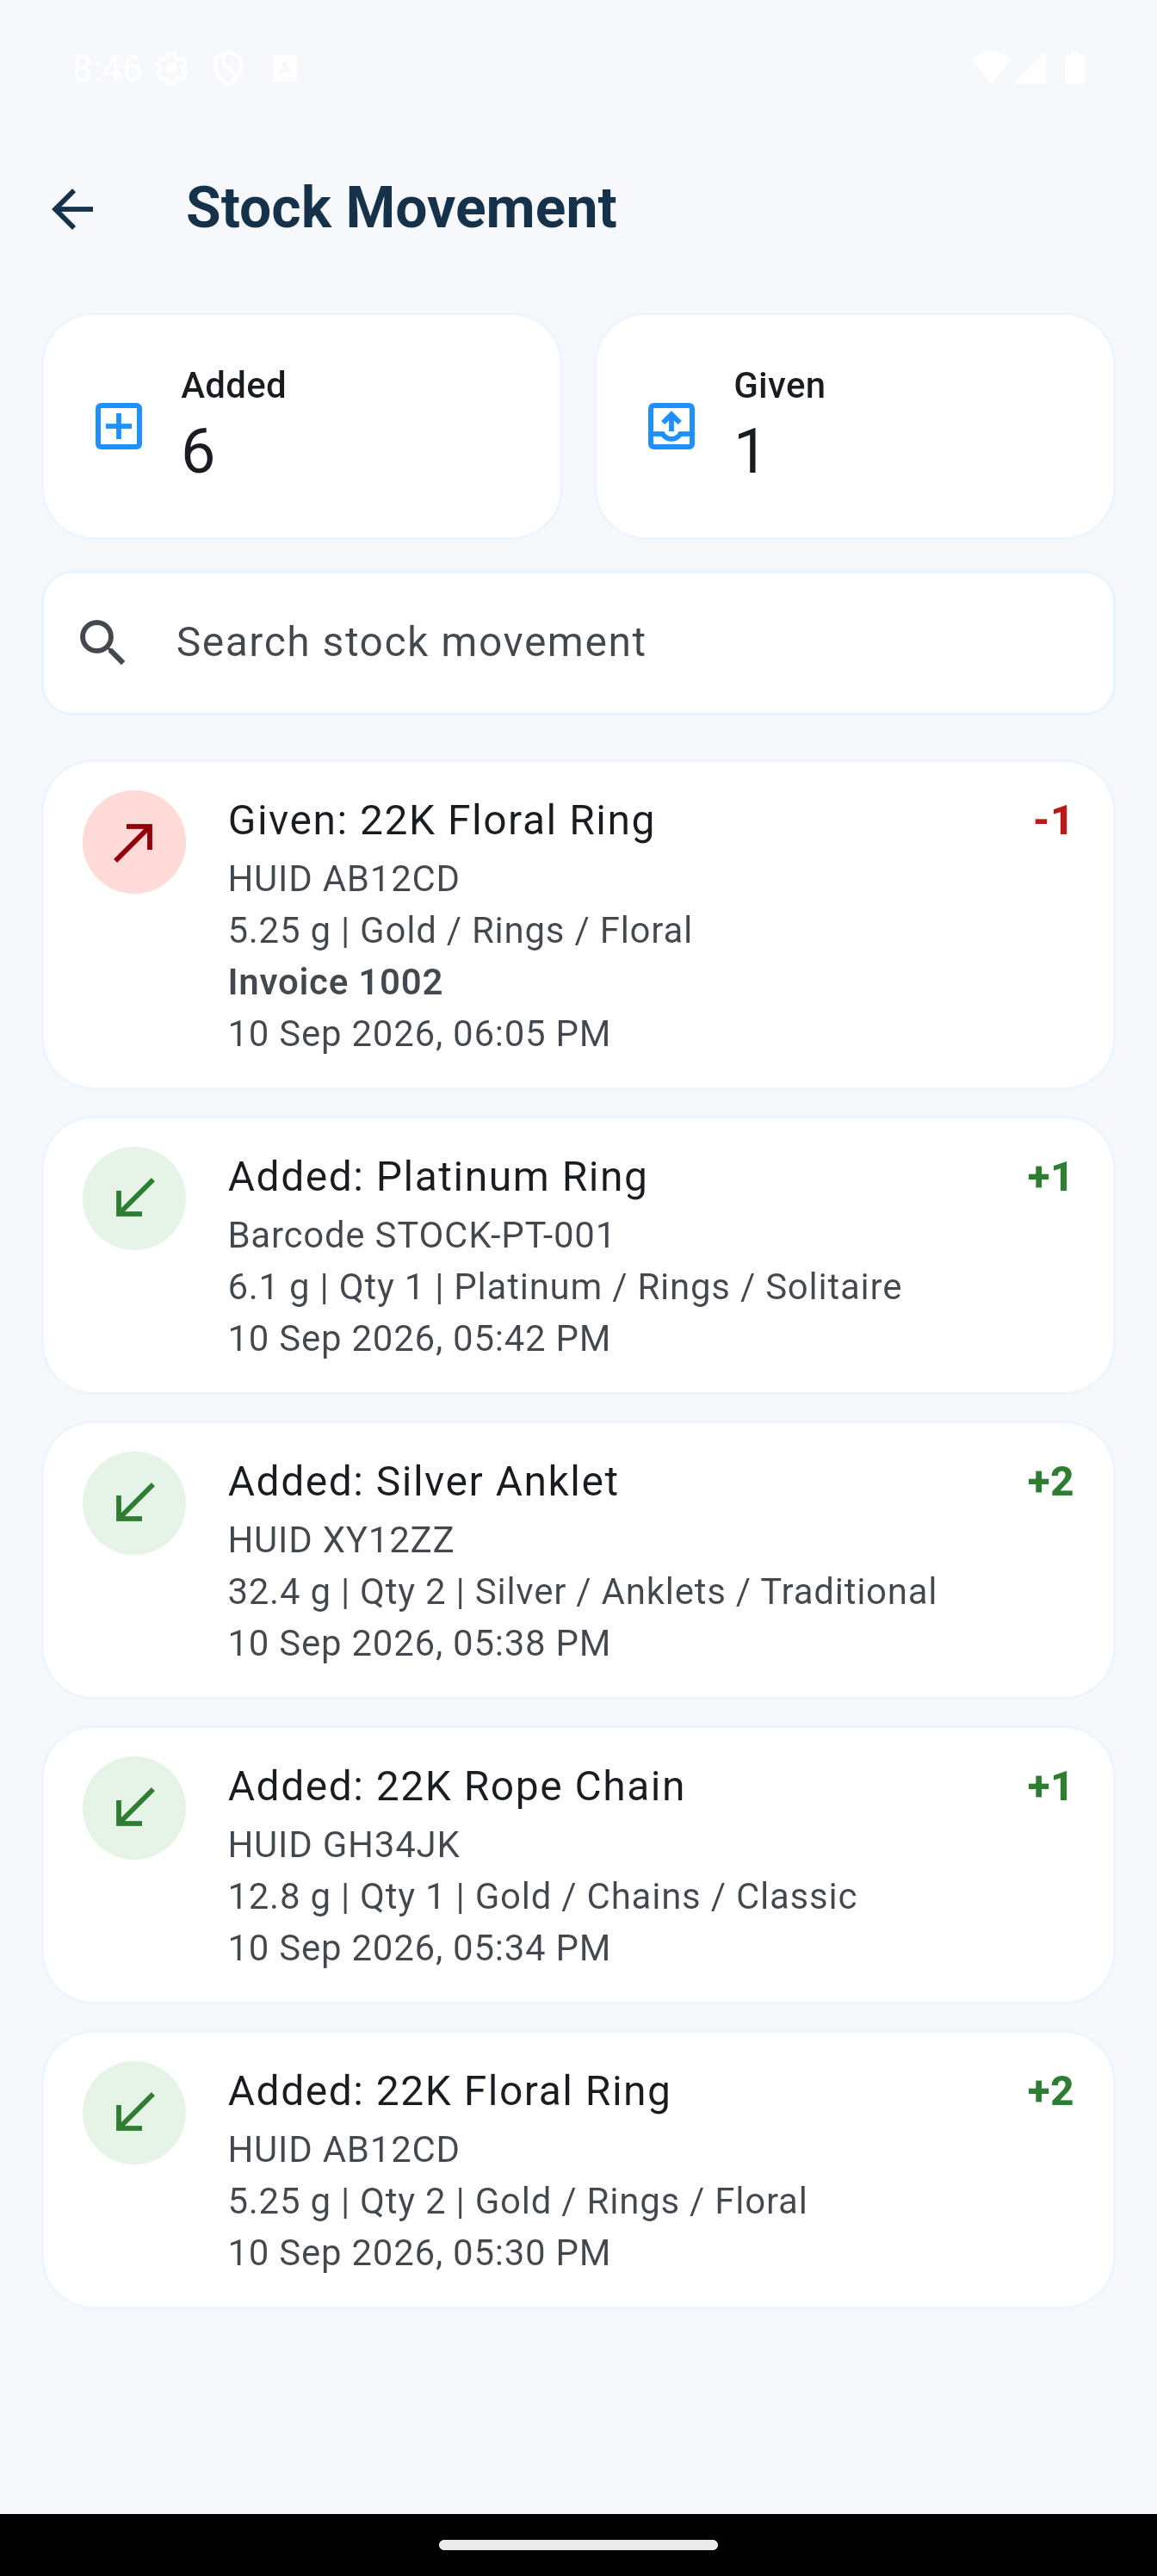
- Stock movement audits additions, edits and the exact HUID given on an invoice.
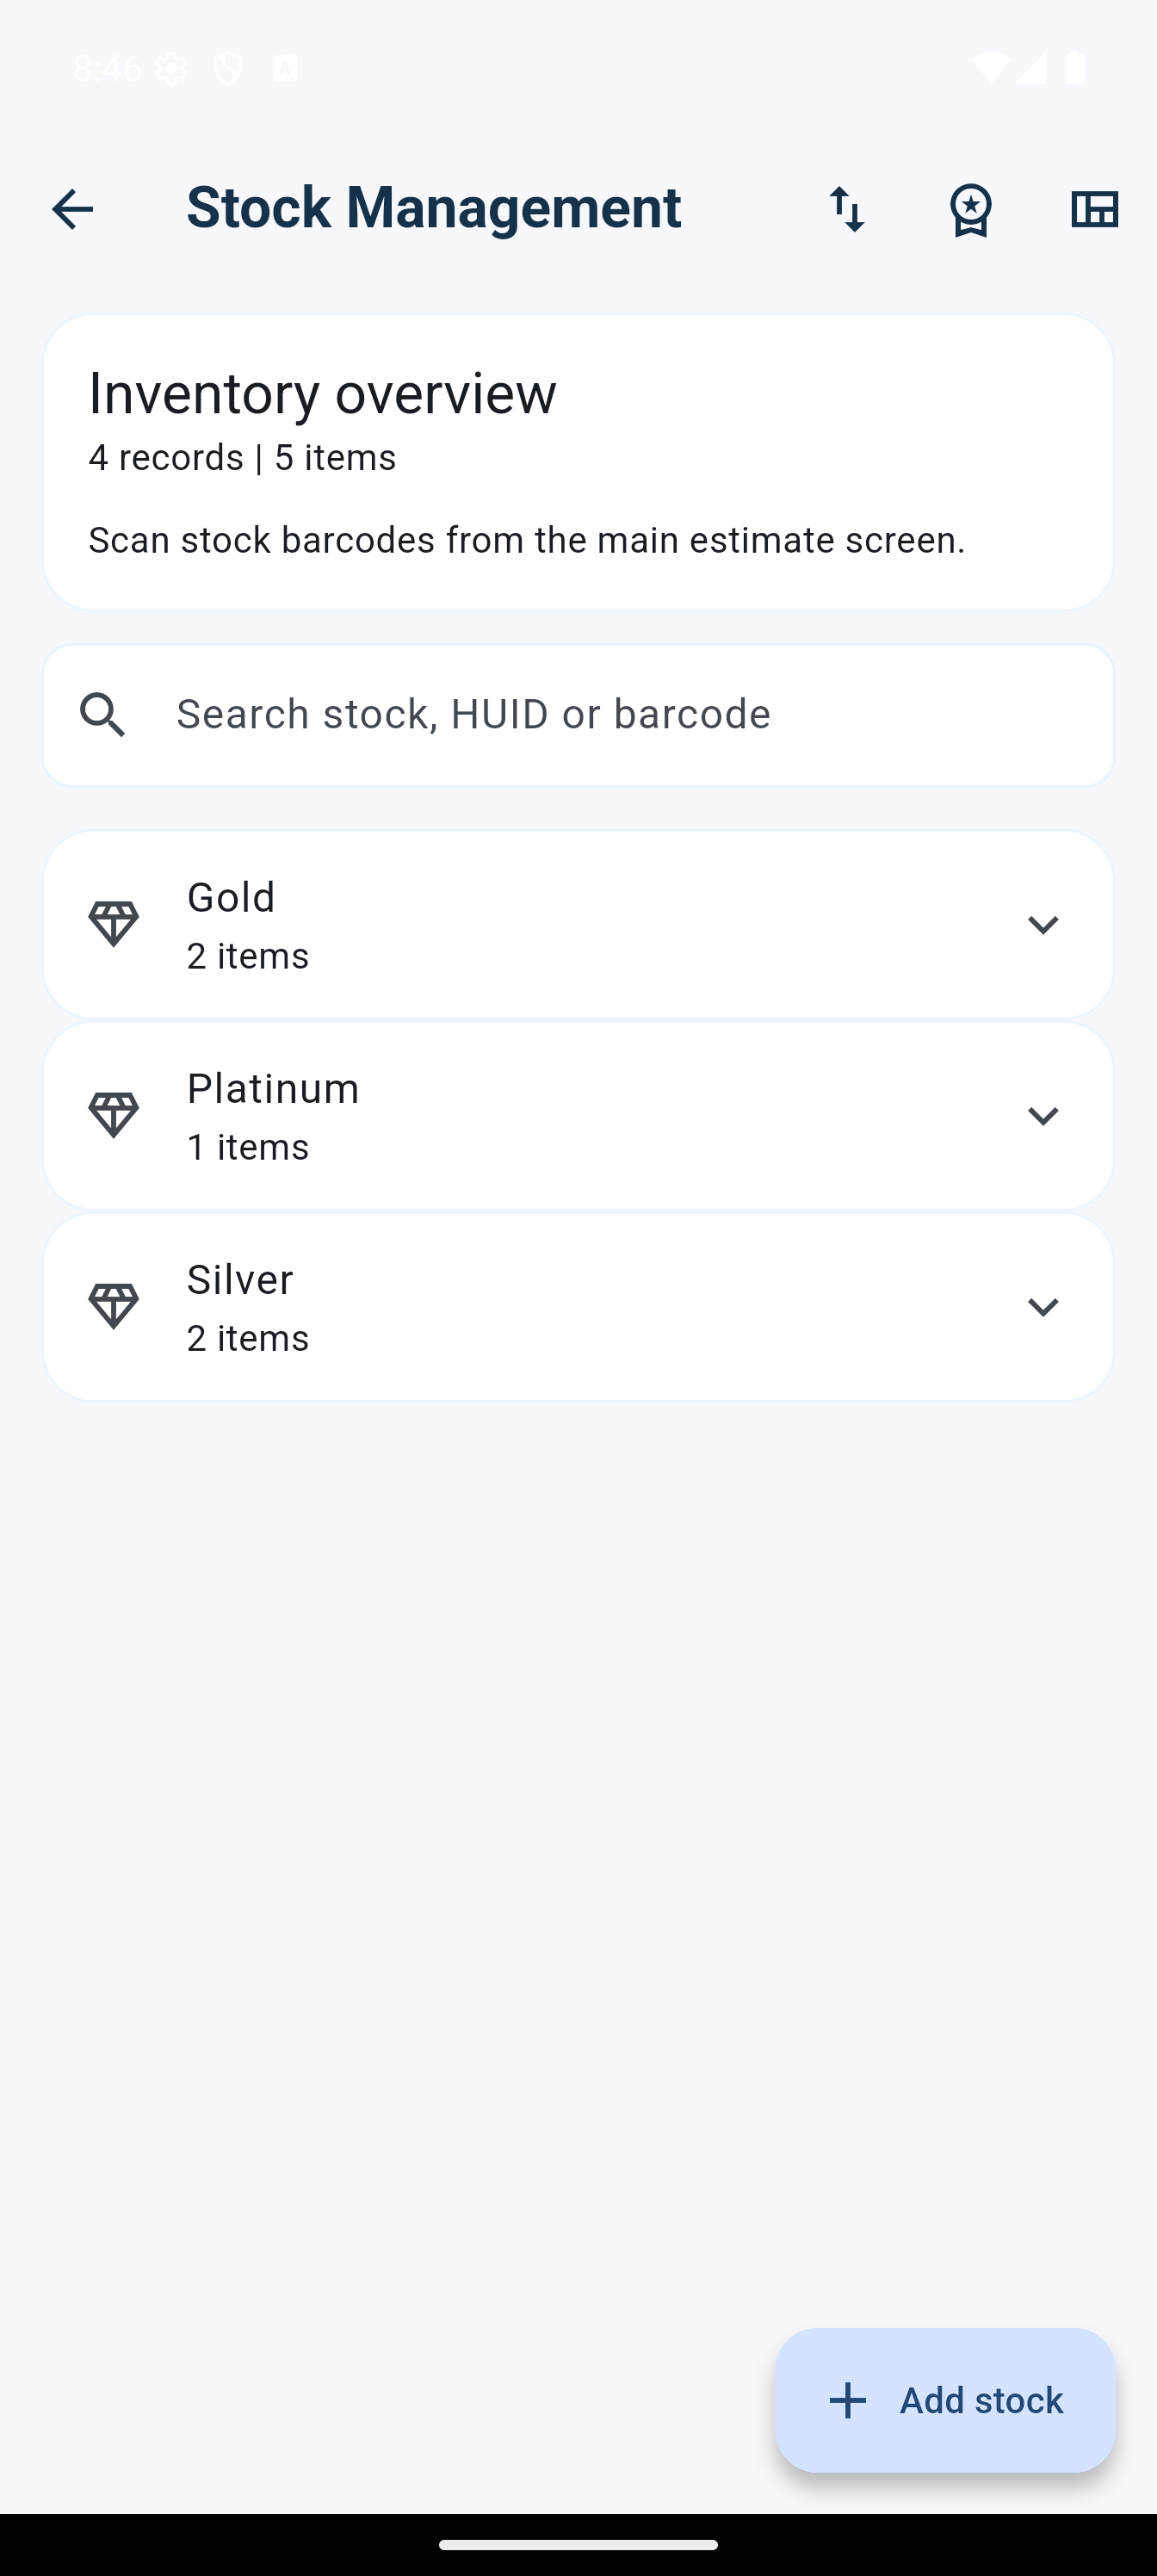
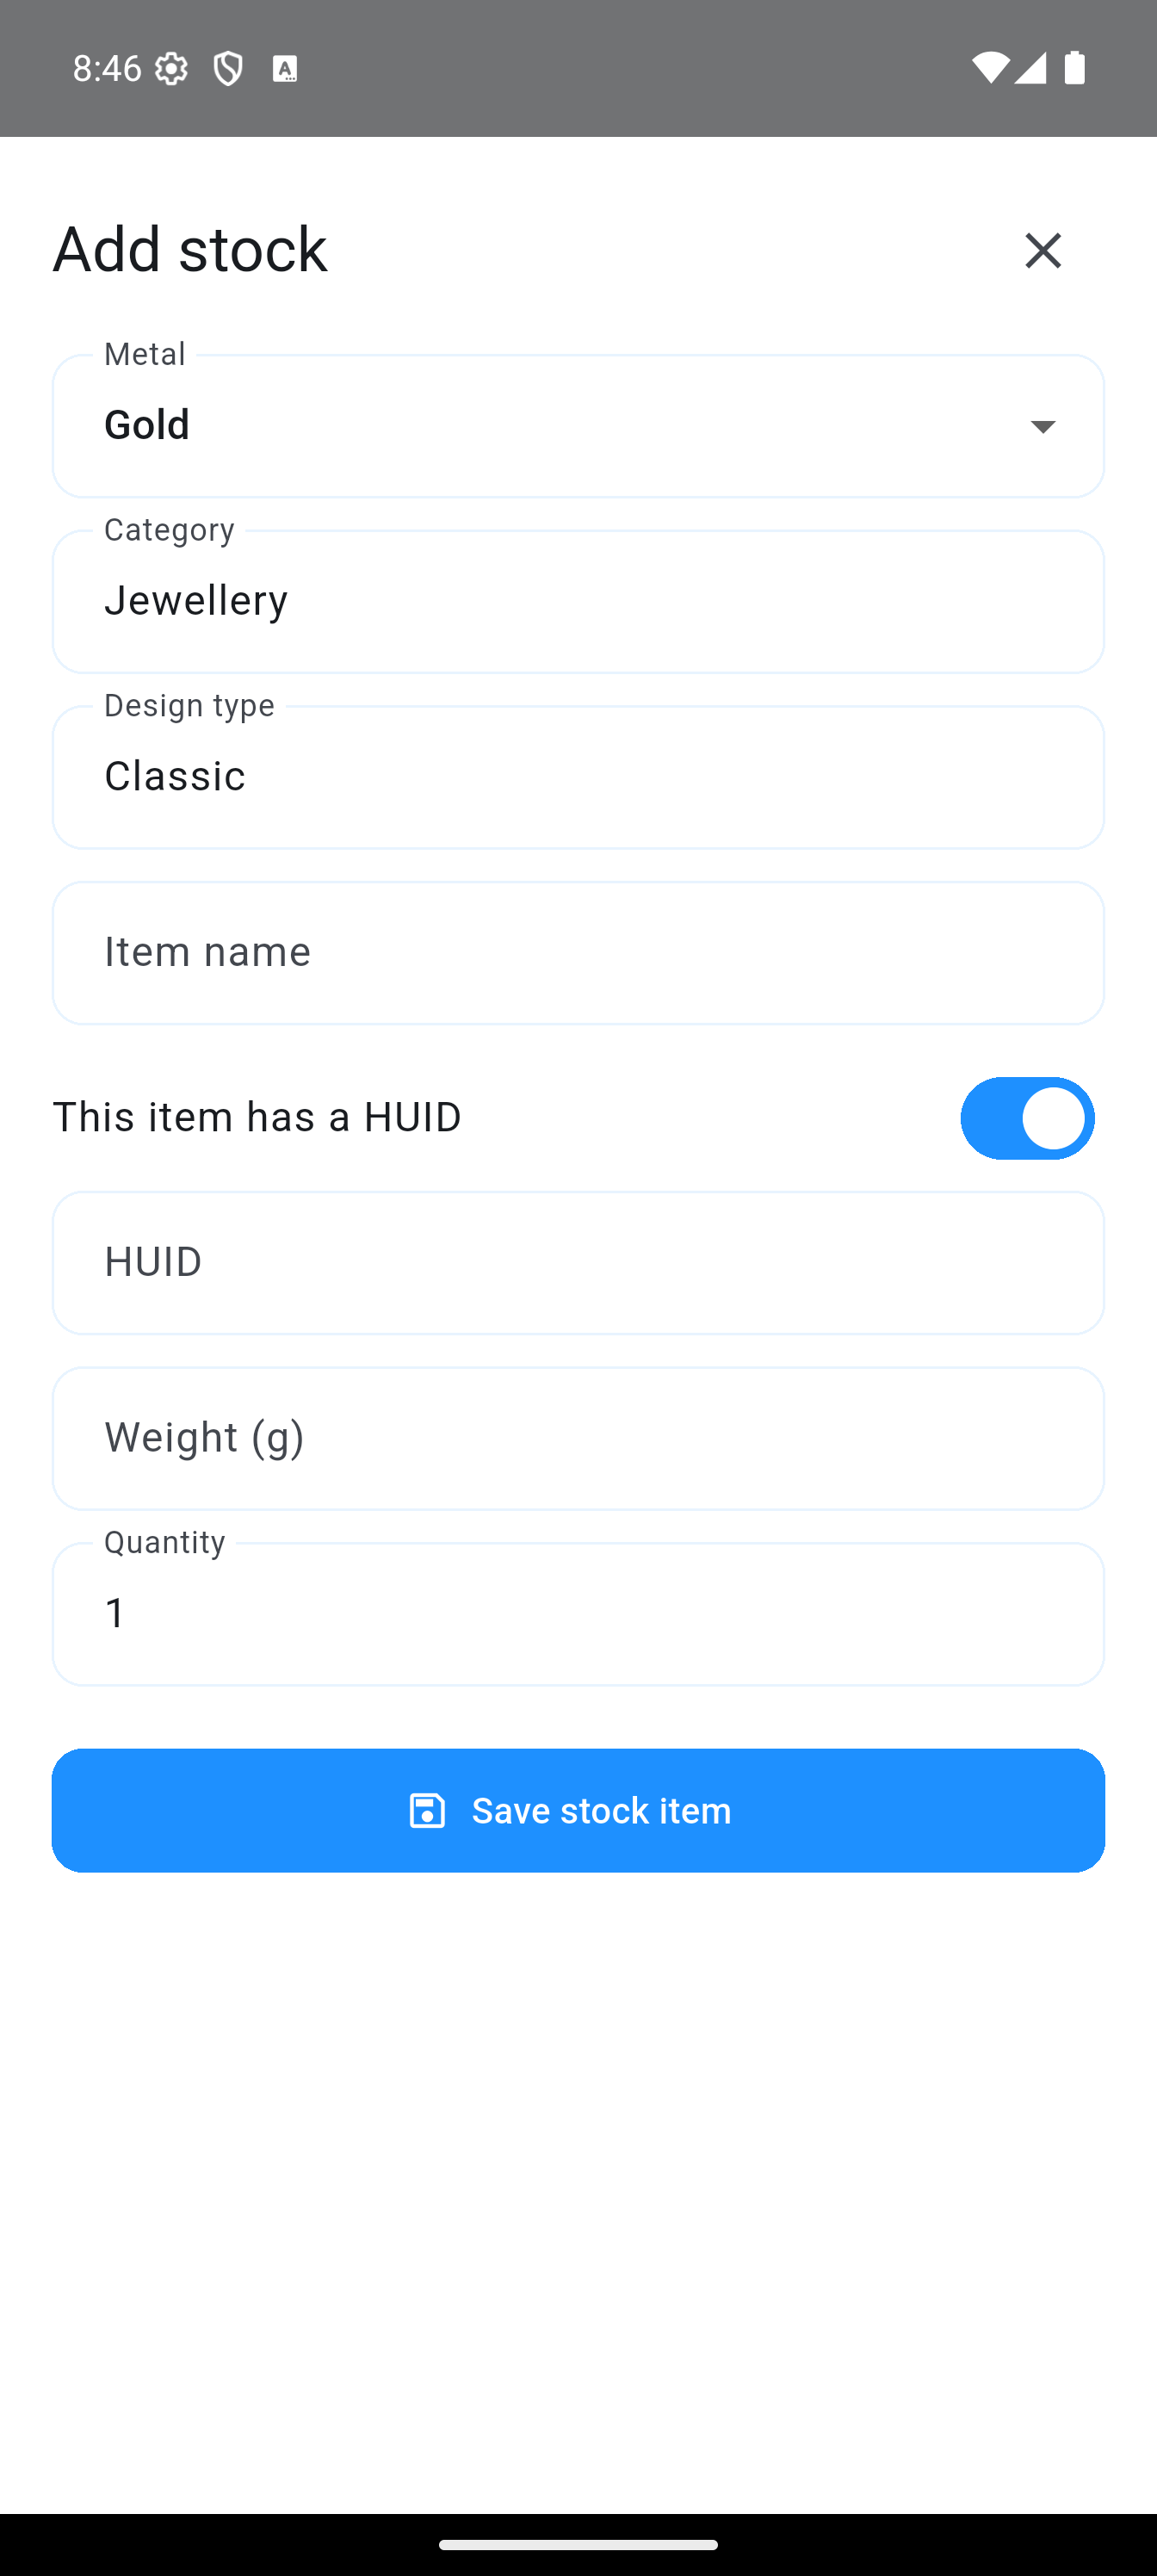
- Open the main menu and choose STOCK → Stock management.
- Select Add stock, then choose the metal and enter category, design type and item name.
- Enable This item has a HUID when applicable, and enter the HUID and item weight.
- Enter quantity and save. Use row actions later to edit, print a label or remove stock.
Bulk import and export
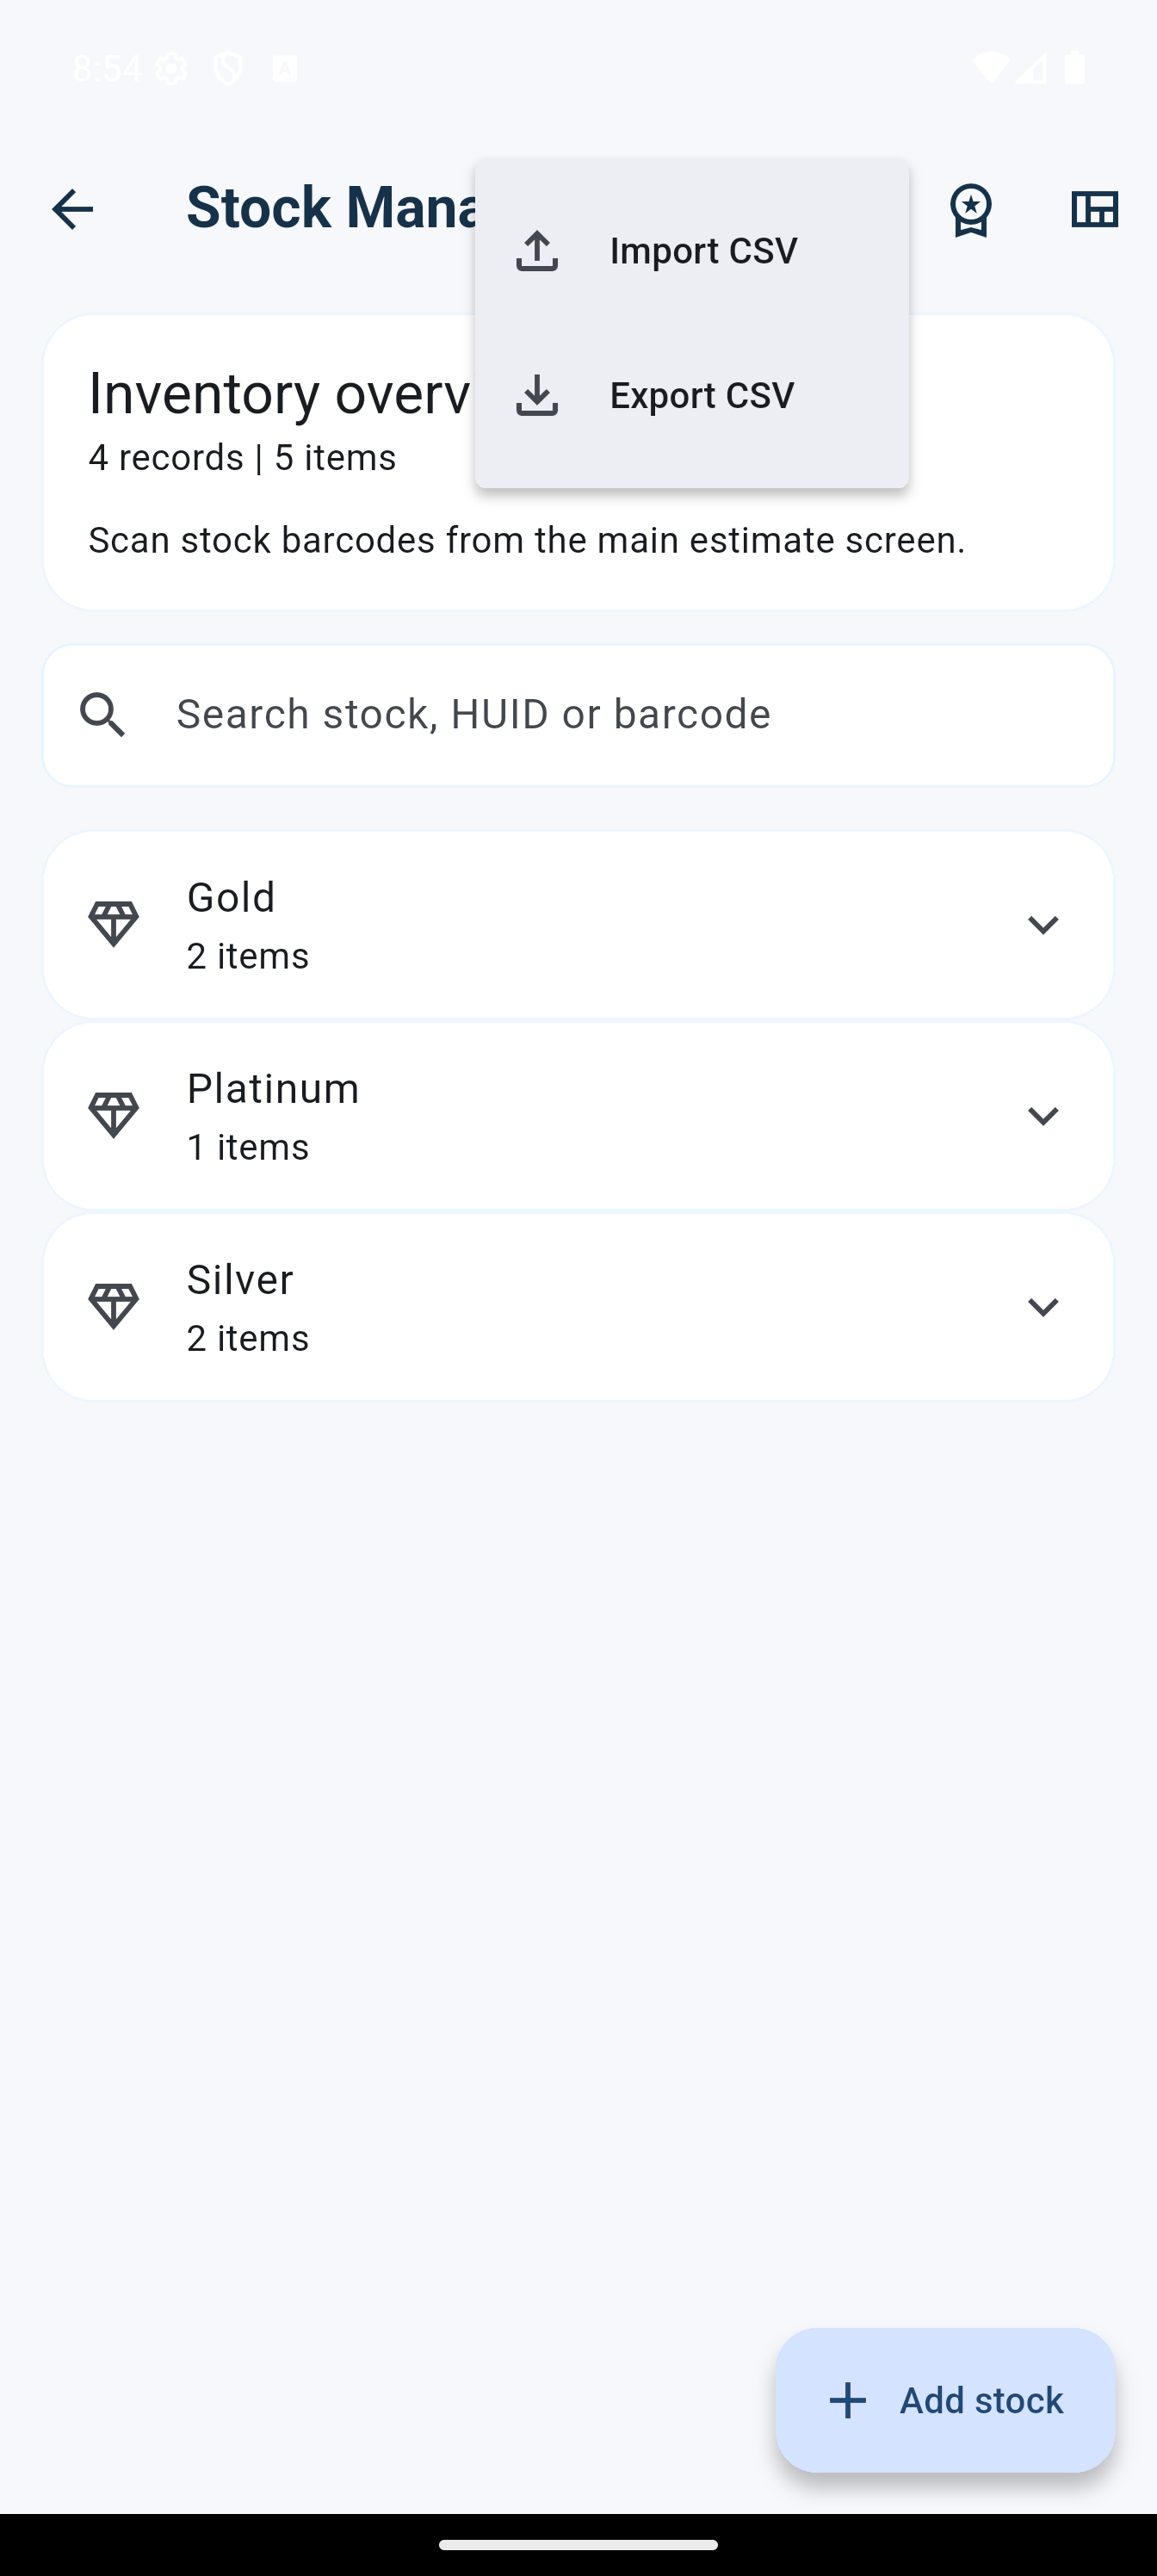
Use the import/export control at the top of Stock Management. Export a CSV as a backup or template, update rows in a spreadsheet, then import the completed CSV. Validate metal, HUID, barcode, weight and quantity before accepting a large import.
Manage and batch-print HUID products
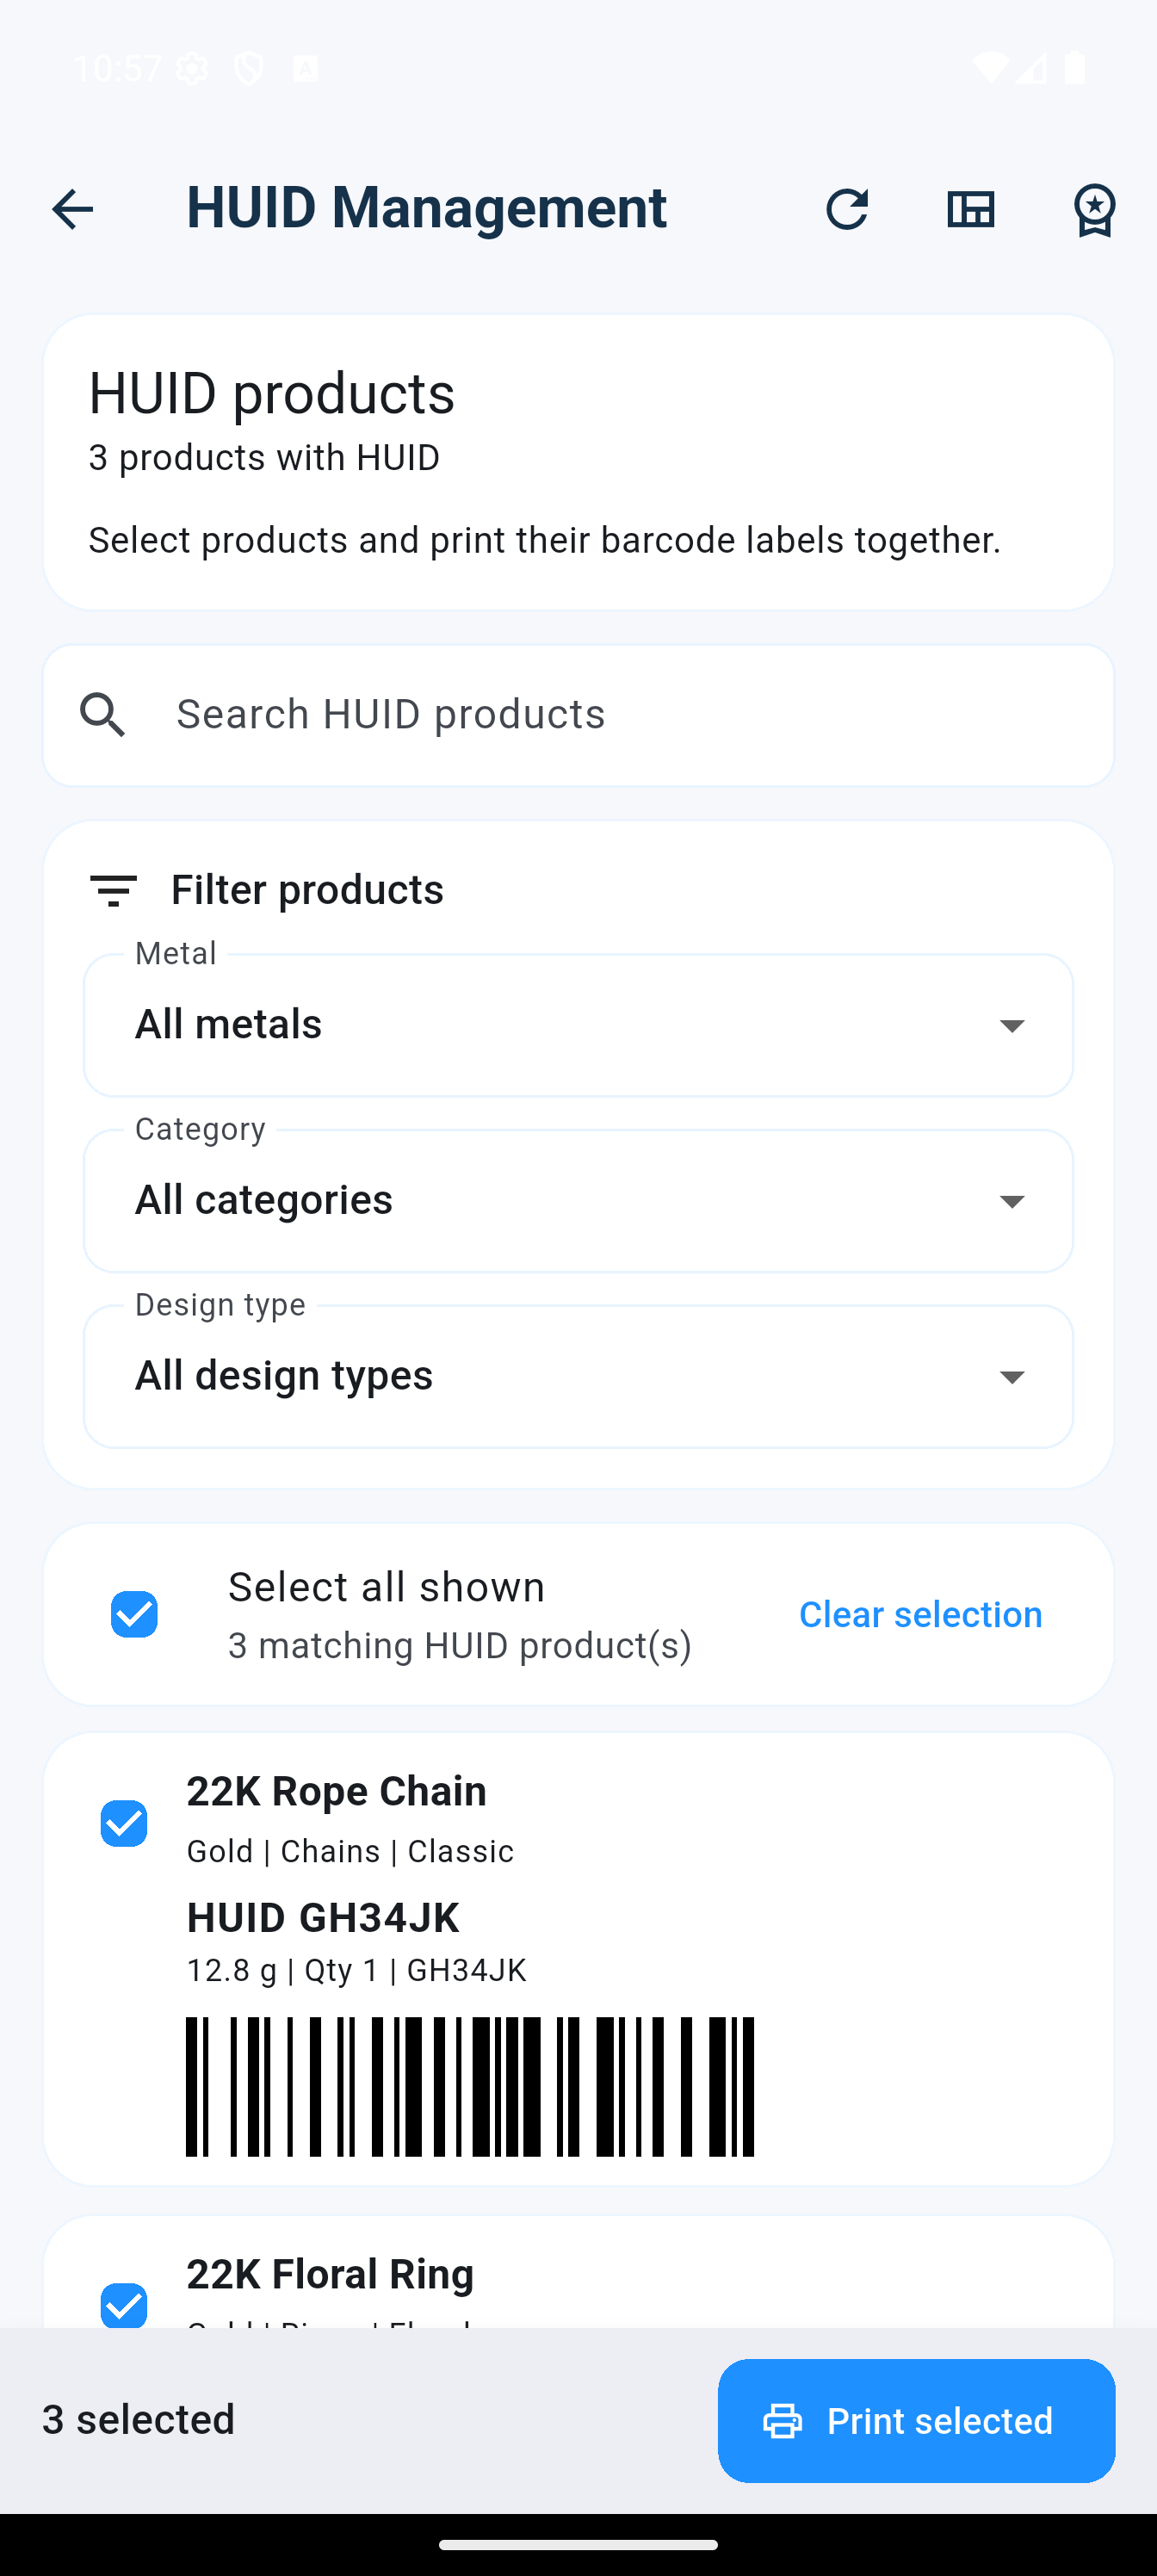
Review every HUID and barcode in one place, then print one or many labels with a single action.
Find and select HUID labels
- Activate the Stock & HUID subscription, then open STOCK → HUID management from the main menu.
- Search by item name, HUID, barcode, metal or weight.
- Use the Metal, Category and Design type filters to narrow the list.
- Select individual products with their checkboxes, or choose Select all shown to select every item in the filtered result.
- Check the selected count at the bottom, then select Print selected.
Each product card shows the item name, stock grouping, HUID, weight, quantity, barcode value and a visible Code 128 barcode. Products without a HUID remain in Stock Management and are not shown on this page.
Design and print HUID barcode labels
Create practical stock stickers for a Bluetooth barcode thermal printer.
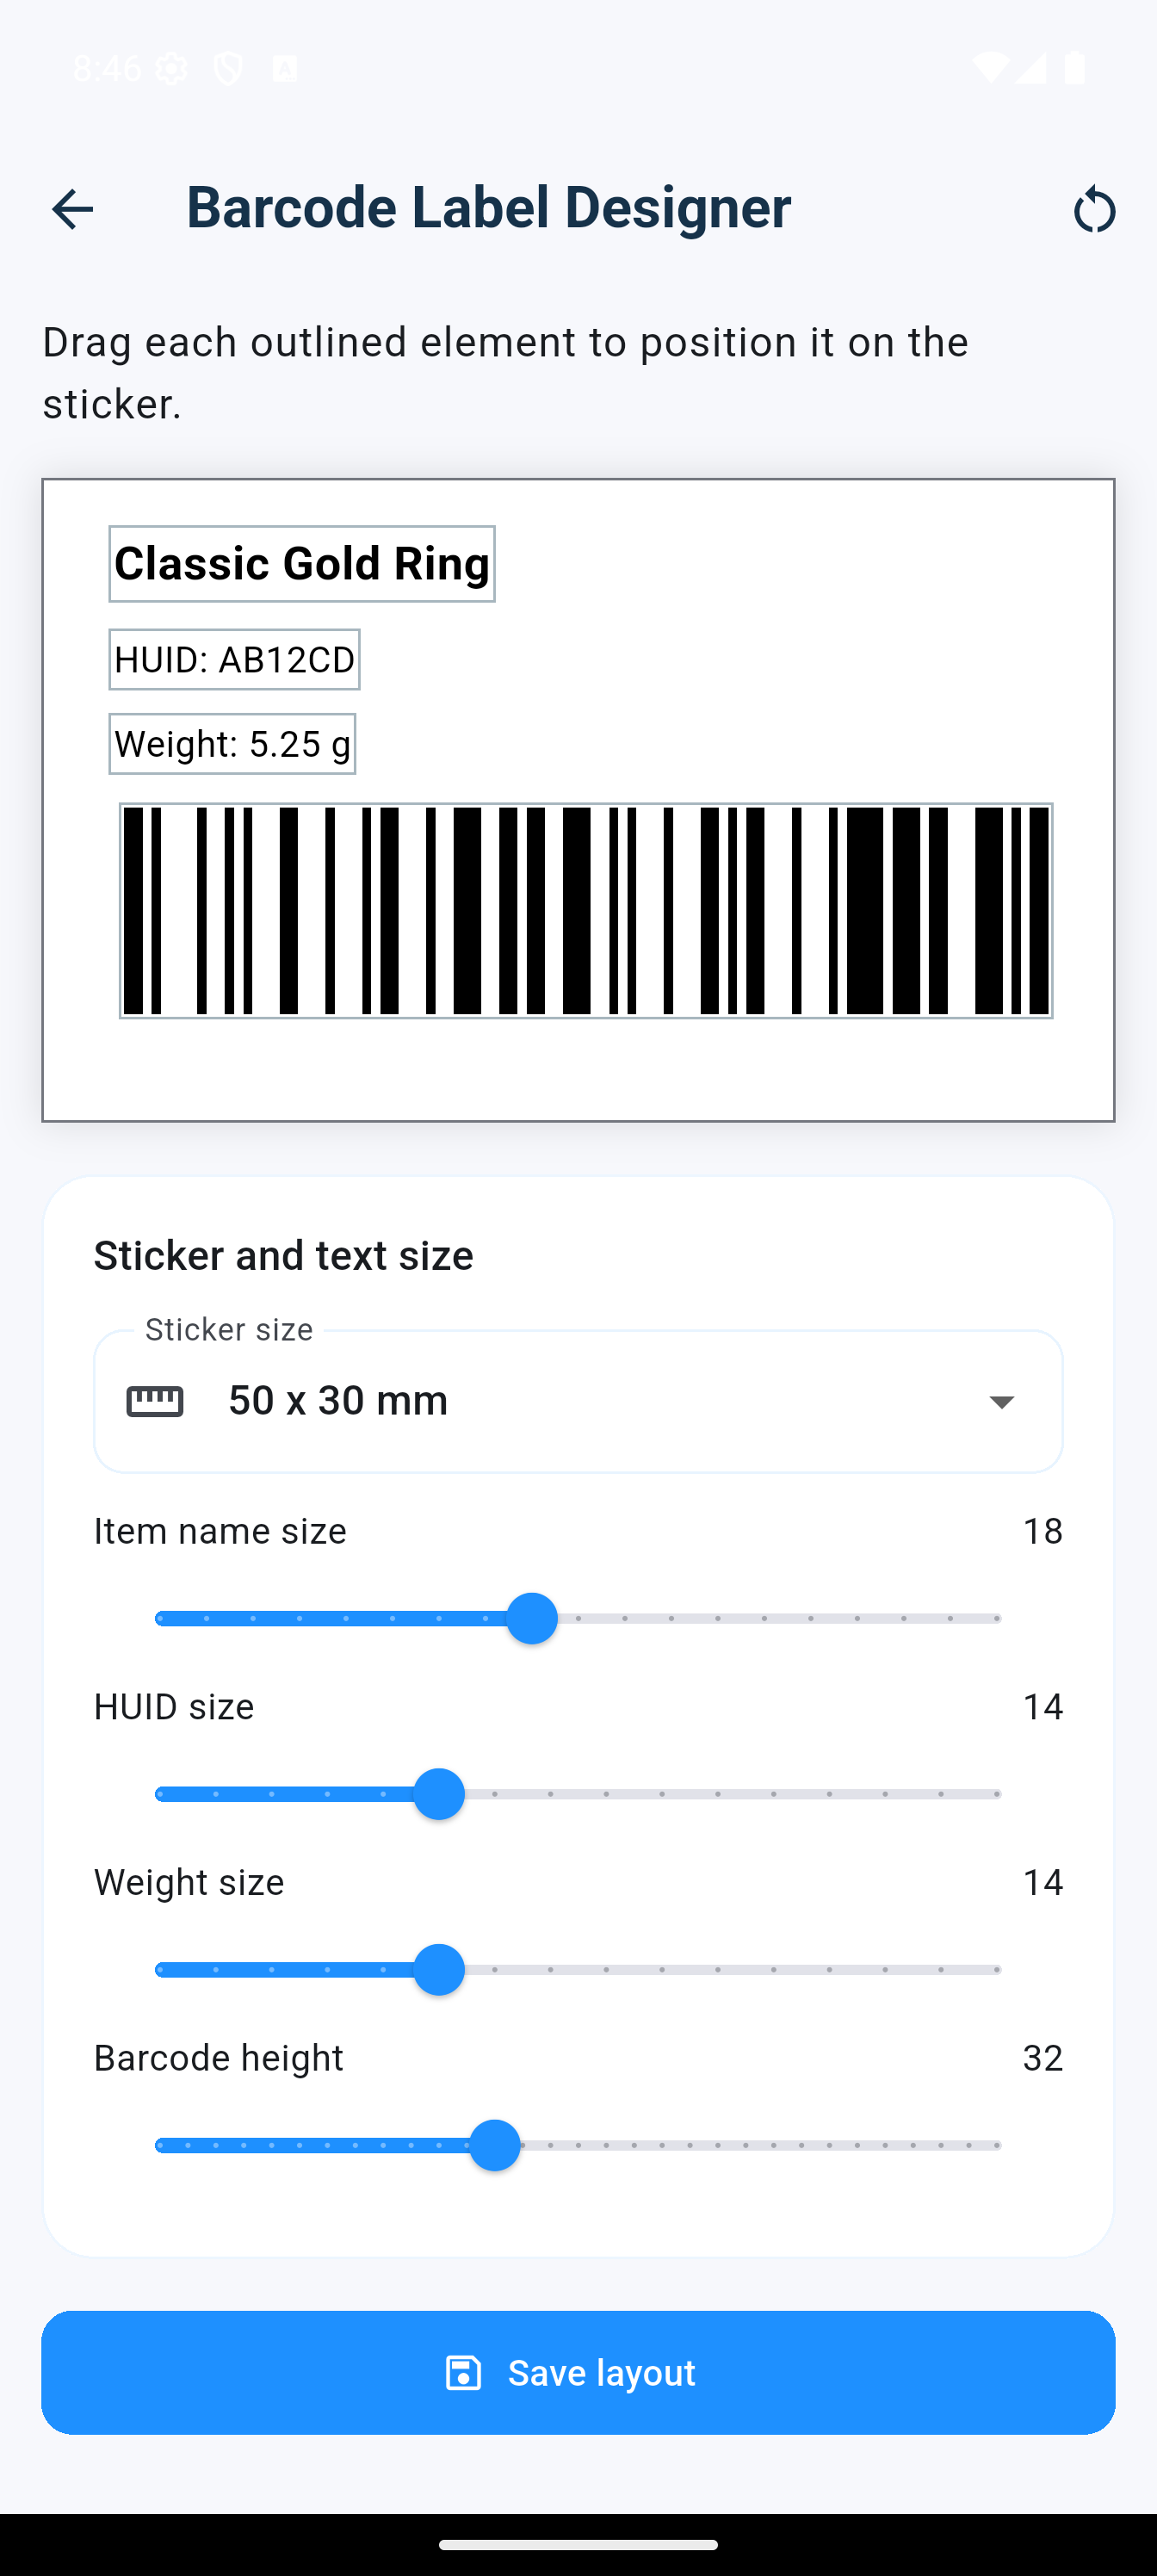
- Open STOCK → Barcode label designer, or use the designer shortcut in Stock Management.
- Set the sticker width and height to match the loaded label roll.
- Drag the item name, HUID, weight and barcode to the required positions.
- Adjust text size and barcode size, then save the layout.
- For one label, open a stock item and select label printing.
- For several labels, open HUID Management, select the required products and choose Print selected.
The printed sticker contains the item name, HUID, item weight and a scannable stock barcode. Use that barcode on the main screen to add the item to an estimate.
Audit stock movement
See exactly which HUID was added, edited or given to a customer.
Open STOCK → Stock movement from the main menu. Each line records the operation, item, HUID, quantity change, date and related invoice when available.
- Added entries identify newly received stock and HUIDs.
- Given entries identify the exact HUID sold through an invoice.
- Edited entries provide traceability when a stock record changes.
- Use filters to isolate a metal, item, HUID, date or movement type.
Scan an estimate QR code
This scanner restores a printed estimate so it can be reviewed or converted to an invoice.
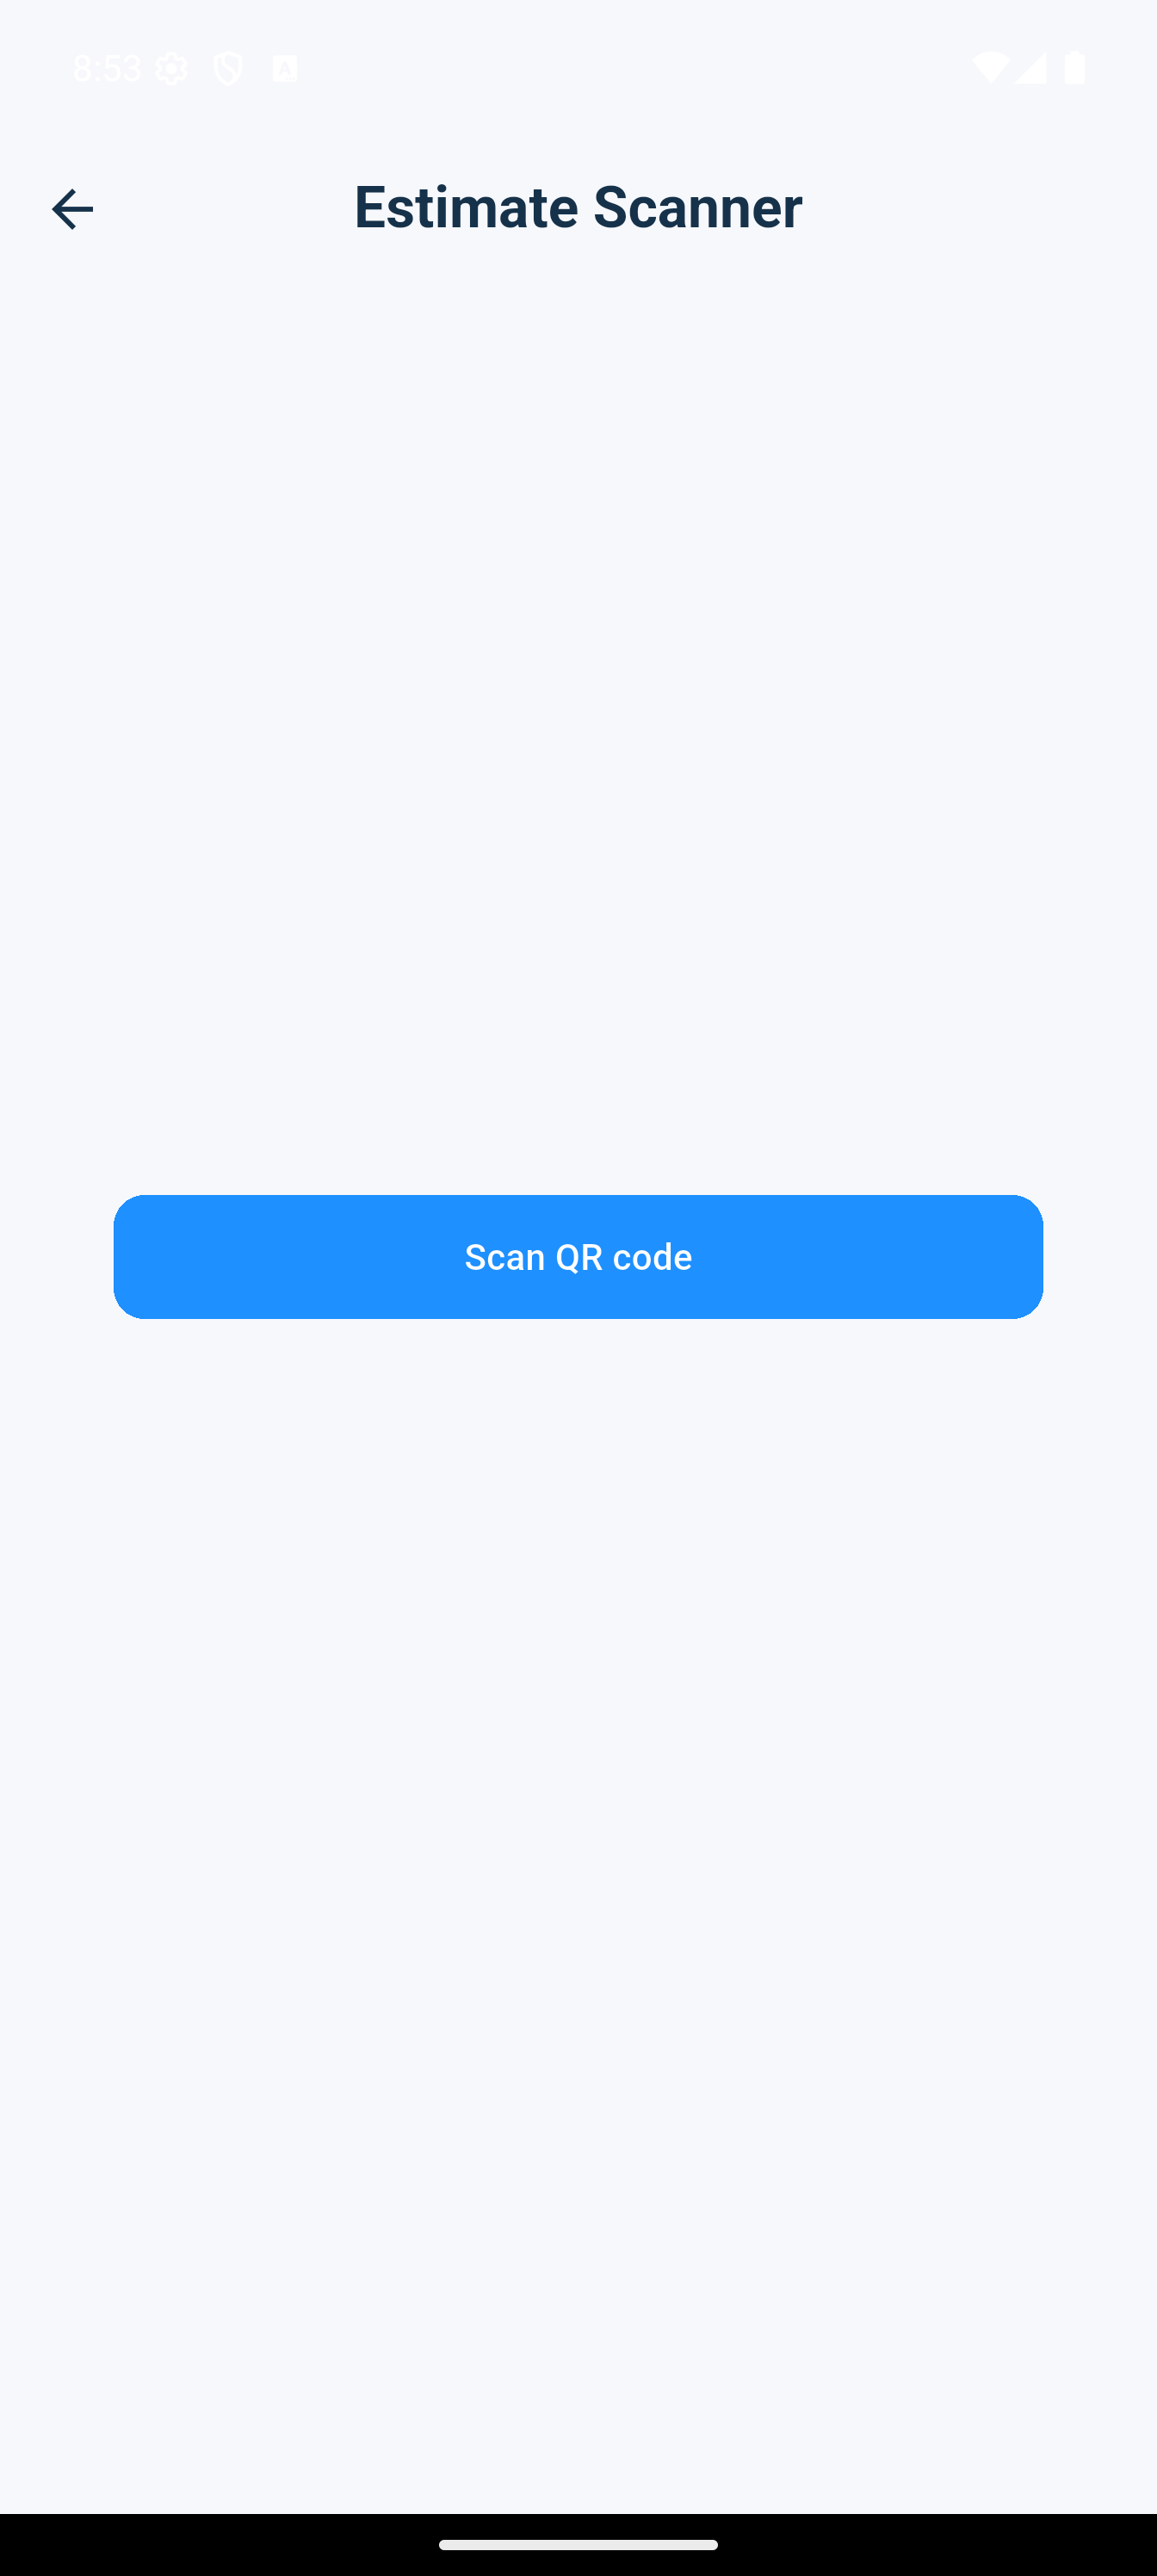
- Open the menu and select Scan estimate.
- Allow camera access and hold the separate estimate QR slip flat inside the frame.
- Keep the device steady with even light until the estimate opens.
- Review the restored products and totals, then continue to Print Tax Invoice.
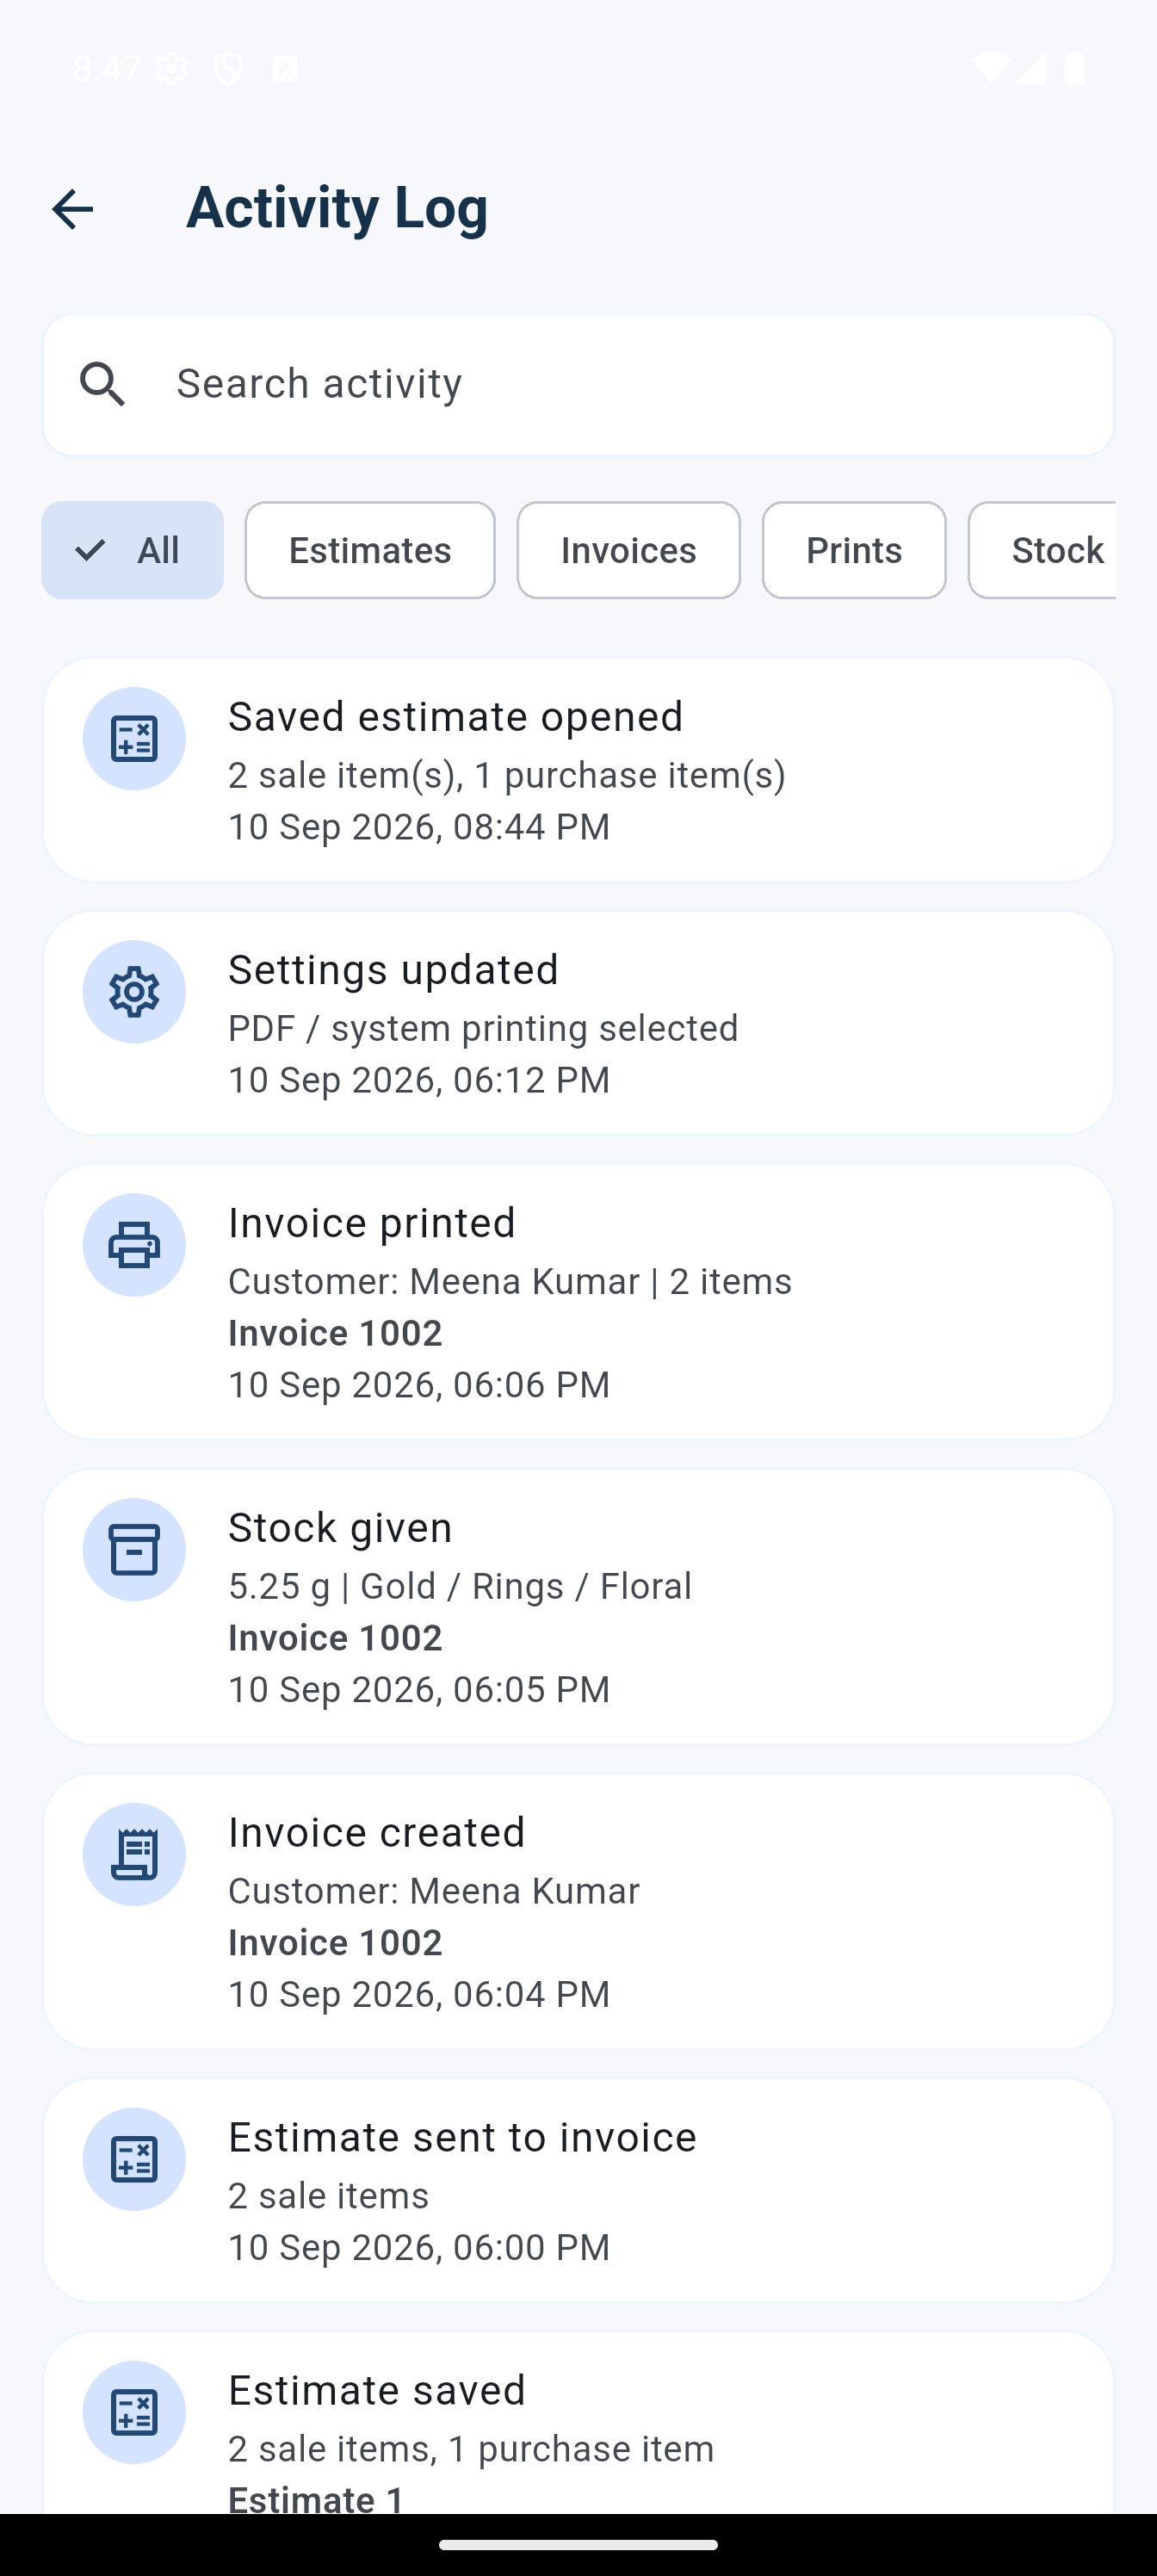
Monitor the Activity Log
Review important actions across estimates, invoices, printing, settings and stock.
The Activity Log records operational events such as:
- Estimate created, saved, opened, shared or printed
- Invoice created, previewed, shared or printed
- Stock added, sold, edited, imported or exported
- Individual and batch HUID label printing
- Settings and other important app changes
Use its search and category filters to reconstruct what happened and when.
Manage subscriptions, ads and purchases
Stock and HUID access and ad removal are separate store purchases.
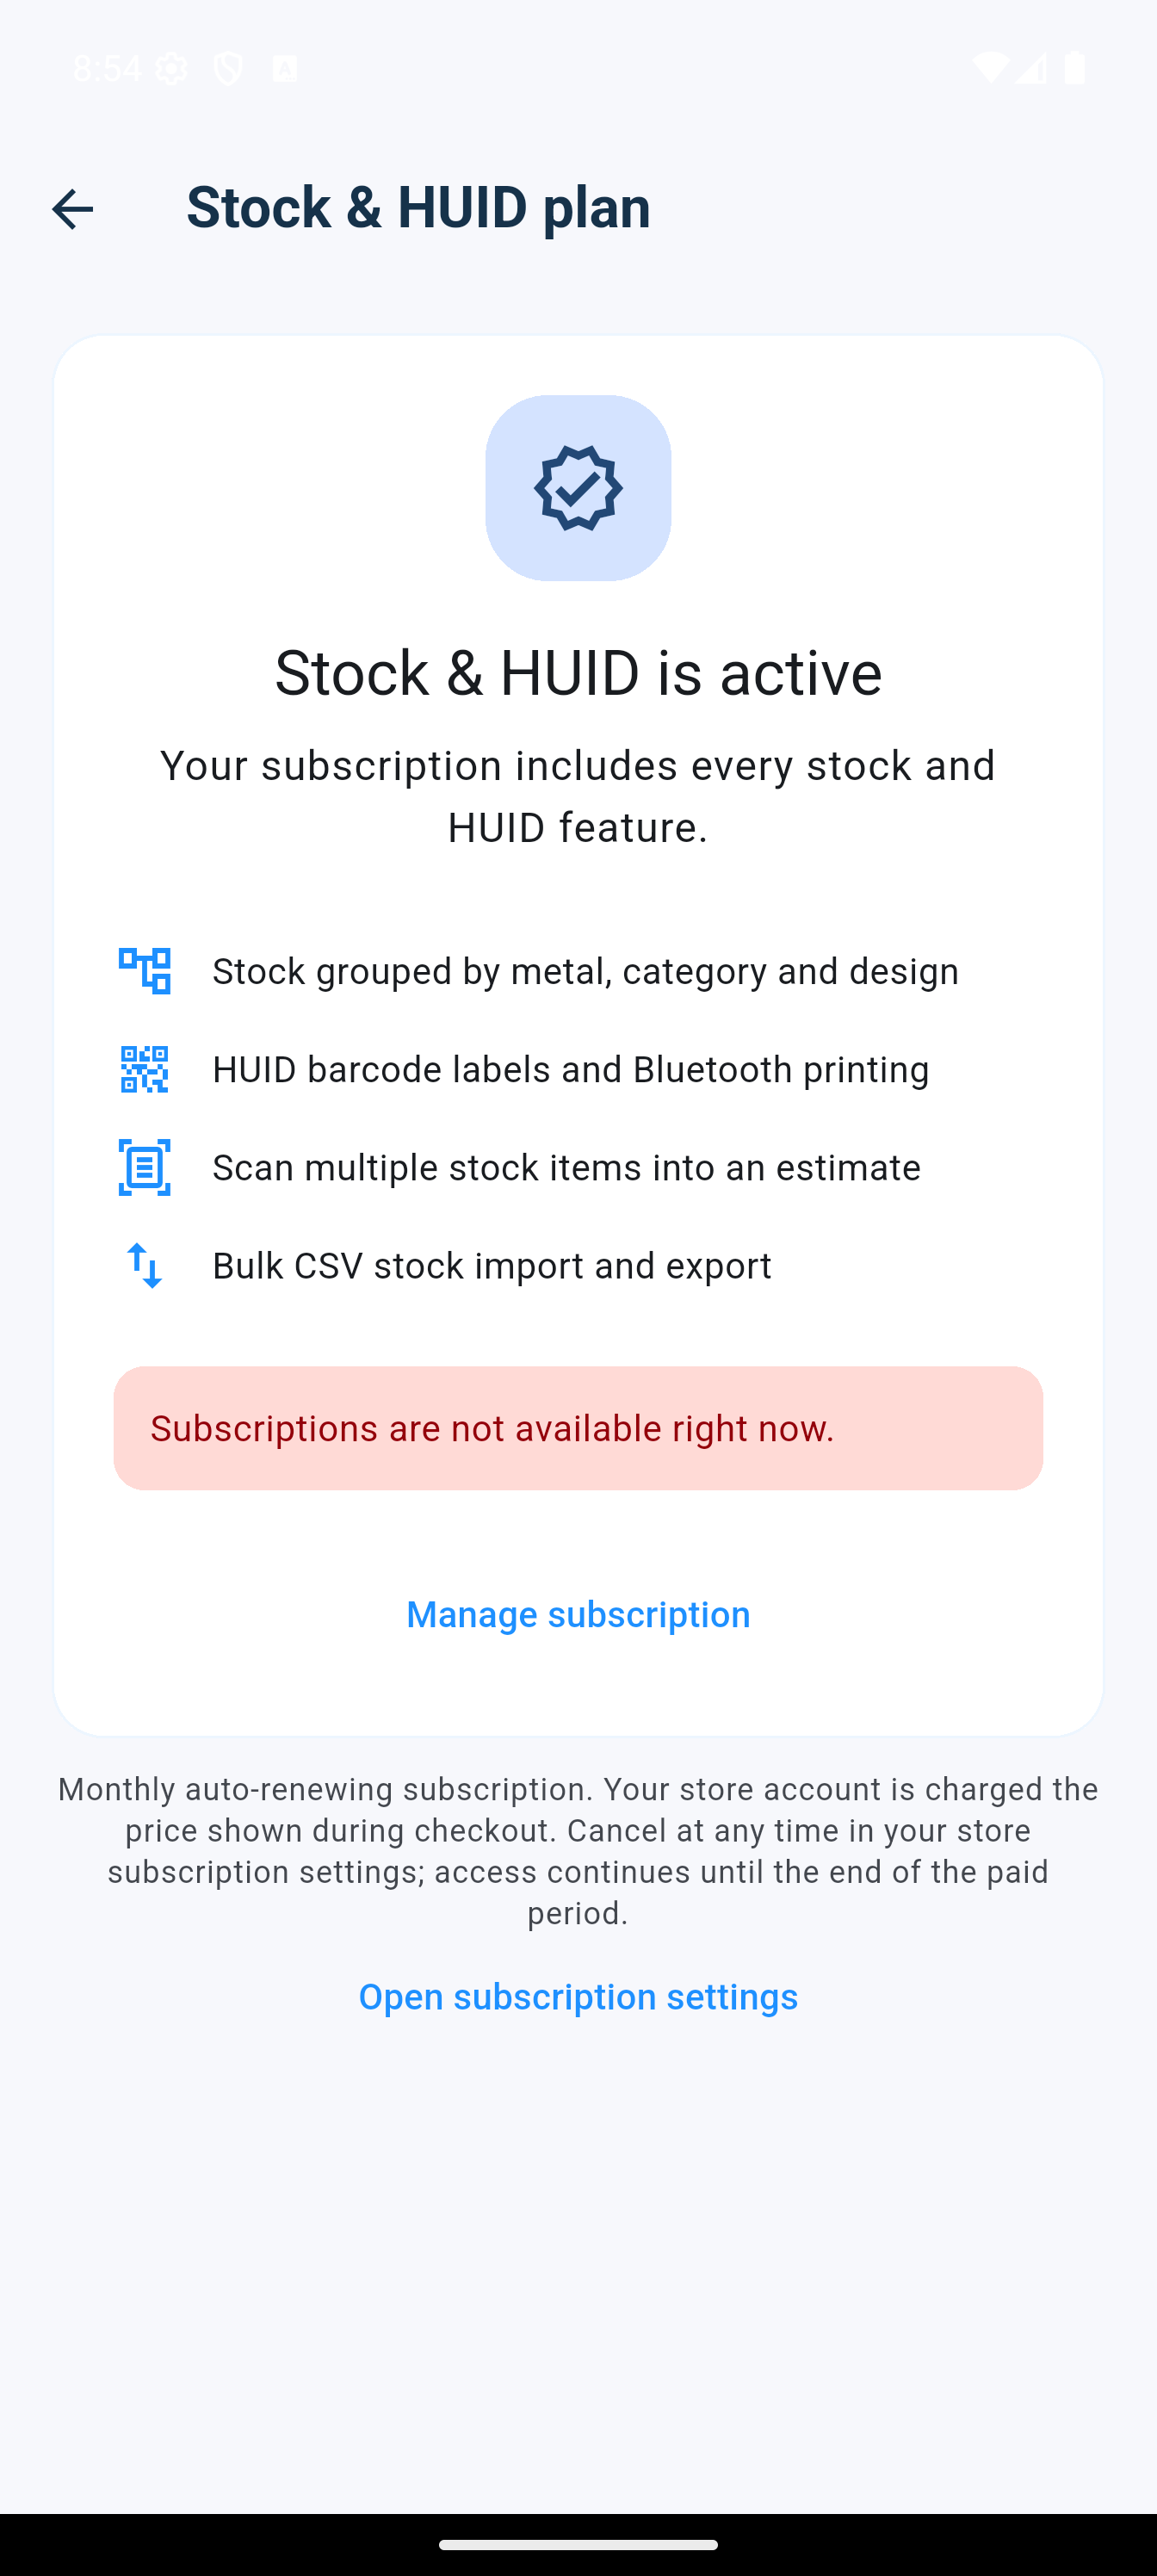
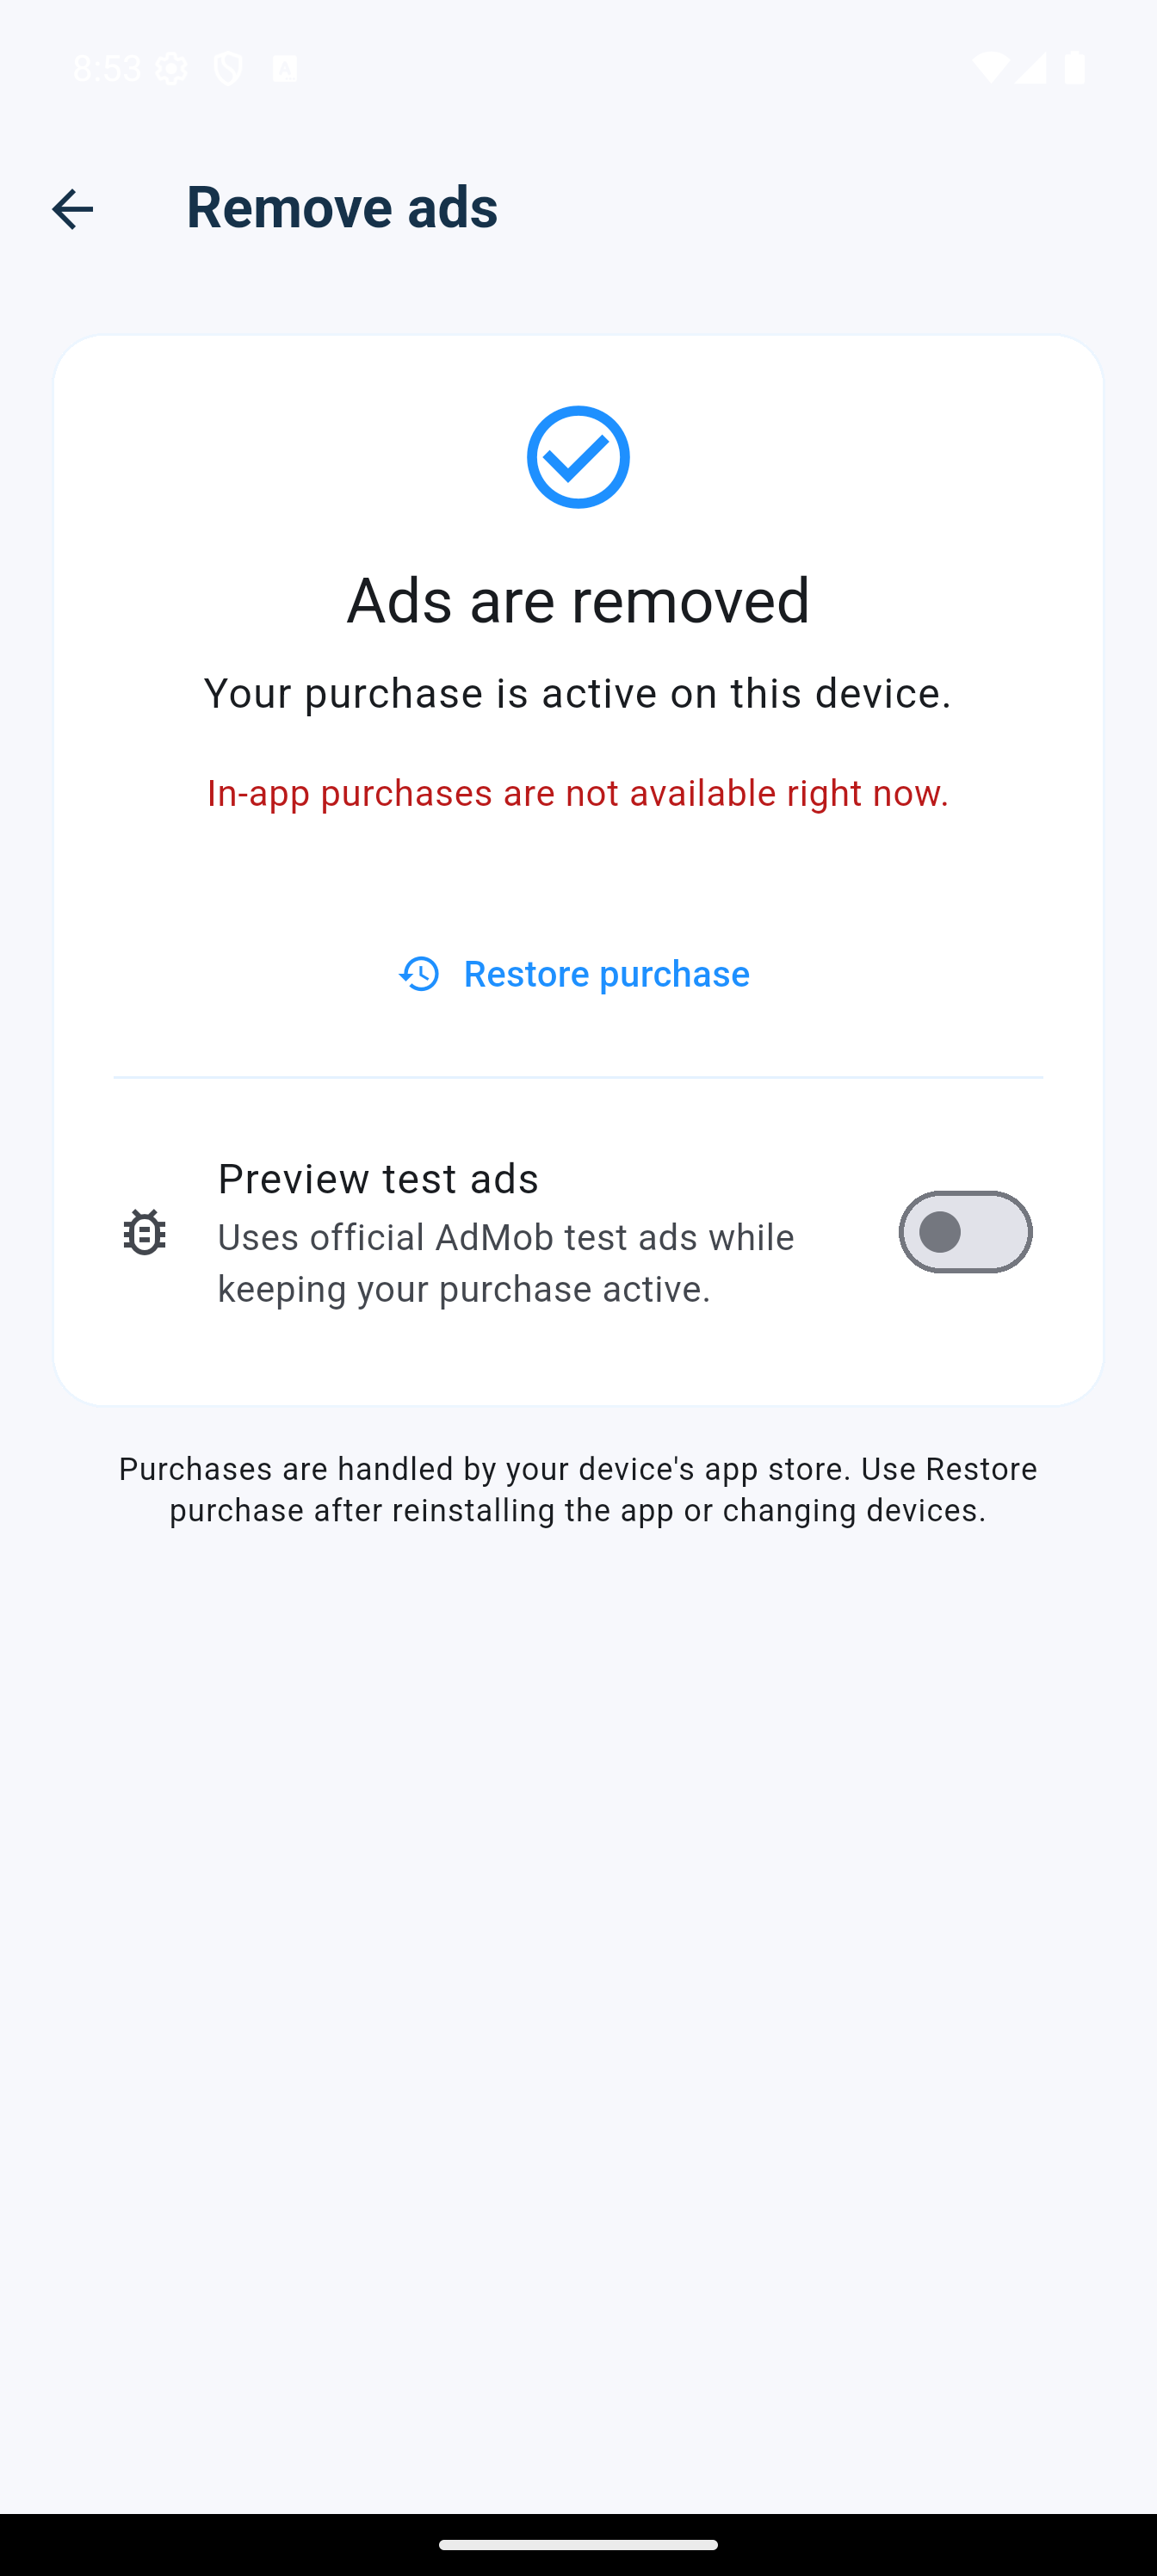
- Stock & HUID
- A monthly auto-renewing subscription unlocks stock management, the searchable HUID Management page, individual and batch label printing, stock scanning, movement history and bulk import/export.
- Remove ads
- A separate purchase hides ads. Use Restore purchase after reinstalling or moving to another device with the same store account.
- Preview test ads
- Temporarily displays official test ads for verification without cancelling an active ad-removal purchase.
- Manage
- Open the device store subscription settings to view renewal, pricing or cancellation. Paid access continues until the end of the current billing period.
Printing and PDF guide
Use PDF for universal output or a Bluetooth ESC/POS thermal printer for counter receipts and labels.
| Output | Android | iPhone/iPad | Important notes |
|---|---|---|---|
| Estimate PDF | Supported | Supported | Preview, system print or share. The estimate PDF includes app attribution and download link. |
| Invoice PDF | Supported | Supported | Professional tax-invoice format; no stock barcode is printed in the customer invoice. |
| Thermal estimate | Bluetooth ESC/POS | Bluetooth Low Energy ESC/POS | Pair or select the printer in Settings. QR prints after a separation/cut line when enabled. |
| HUID barcode label | Bluetooth label printer | Compatible Bluetooth label printer | Use HUID Management to filter, select or select all shown, then batch-print with the saved custom layout. |
| IP printer | Not used | Not used | The app uses Bluetooth and PDF workflows only. |
If a printer does not respond
- Confirm the printer is powered, loaded and not connected to another phone.
- Allow Bluetooth permissions and reconnect it from Settings.
- Confirm the correct paper width and barcode label size.
- Use PDF/system print while diagnosing thermal-printer compatibility.
If scanning fails
- Grant camera permission and clean the camera lens.
- Use bright, even light and avoid glare on glossy labels.
- Keep the full QR or barcode inside the frame.
- Reprint at a larger size if bars or QR modules merge into a solid block.
Quick reference
Use this map when you know the result you need.
| I want to… | Go to… | Then… |
|---|---|---|
| Create a manual estimate | Home → Sell / Buy | Add items, open Total, select Estimate. |
| Add stocked jewellery | Home → Scan stock barcodes | Scan several labels, close scanner, review Total. |
| Convert a saved estimate | Menu → Estimate logs | Open row actions → Convert to invoice. |
| Convert a printed estimate | Menu → Scan estimate | Scan the QR slip and continue to tax invoice. |
| Find a customer invoice | Menu → Invoices | Search name, invoice number, item, HUID or barcode. |
| Add inventory | Menu → STOCK → Stock management | Add stock with metal, category, design, HUID and weight. |
| Design a barcode label | Menu → STOCK → Barcode label designer | Adjust sticker dimensions, positions and element sizes, then save. |
| Print one HUID label | STOCK → Stock management | Open the item actions and print by Bluetooth. |
| Print several HUID labels | STOCK → HUID management | Search or filter, select products or Select all shown, then choose Print selected. |
| Audit an exact HUID | STOCK → Stock movement | Search or filter the movement history. |
| Audit app operations | Menu → Activity log | Filter estimate, invoice, print or stock events. |
| Restore a purchase | Menu → Remove ads or Stock plan | Select Restore or Manage with the same store account. |
| Report an app problem | Menu → APP → App support | Add your contact details, describe the issue, attach a screenshot if helpful, then send. |